


Chapter 5 Managing Your Contacts
Managing Your Personal Address Book
5-4
Cisco IP Phone 7960 and 7940 Series User Guide
78-10182-08
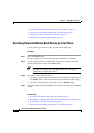
Creating a New Address Book Entry on the Web
Follow these steps to create a new address book entry.
Before You Begin
Log in to the User Options web page. For information on the User Options web
page and how to access it, see the
“Logging In to the User Options Web Pages”
section on page 1-16.
Procedure
Step 1 From the User Options web page, click Configure your Cisco Personal Address
Book.
The Find/List Personal Address Book Entries page appears.
Note You can add entries manually or use a synchronizer application to
automatically import entries from your Microsoft Outlook address book.
To obtain the synchronizer, contact your system administrator.
Step 2 Click Add a New Entry.
The Address Book Entry window appears.
Step 3 Enter information in the desired fields and click Insert.
Step 4 When you are finished:
• Click Return to Search, Fast Dials, or Add a New Entry to continue
working in the Find/List Address Book Entries page.
• To exit, click Return to the Menu or Log Off at the bottom of the page.
Related Topics
• Subscribing to Personal Address Book, page 5-2
• Searching for or Editing a Personal Address Book Entry on the Web, page 5-5
• Searching Personal Address Book Entries on Your Phone, page 5-6
• Editing a Personal Address Book Entry on Your Phone, page 5-7