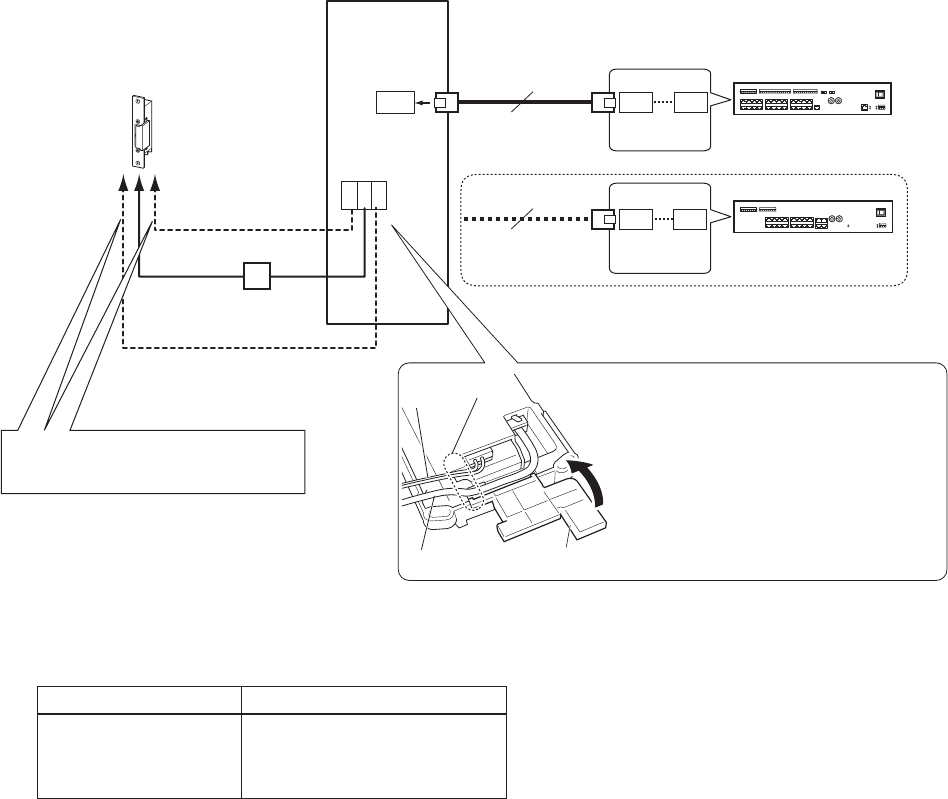
Aiphone IS Intercom System User Manual


22
Registering IP units [System setting – IP
unit registration]
Register IP units by selecting from the connected ones to the
system.
To register a PC master station, rst install the application
*
(IS-SOFT) to a PC, then connect the PC to the network and
then start IS-SOFT.
Click
1
IP unit registration in the table of contents.
Click
2
IP unit search
.
All the IP units connected to the system are displayed in
the [Search result] on the lower side of the window.
If IP units are not displayed, repeat this step until
*
displayed.
Check the boxes for the IP units you want to register,
3
and then click
Add to the imported IP units list
.
The checked IP units are registered and displayed in
[Imported IP units list] on the upper side of the window.
Enter data or change settings for the registered IP
4
units as needed.
For "Port number", the sequential numbers are
*
automatically assigned as needed. (You can also enter
port numbers manually.)
Do not use port numbers that overlap those of other
*
devices connected to the same network.
Port number auto-setting
:
Click this to assign sequential port numbers
automatically.
Port forwarding setting
:
Click this and you can con rm the port forwarding
settings to be made on the router in another window.
If [UPnP] is set to OFF at
*
[Network setting:
Common], make the port forwarding setting on the
router with the set contents in this window manually.
Click
*
Reload
on this window to update the current
port forward setting, and click
Close
to close this
window.
Click
5
Temporarily stored
to save the current setting
results temporarily.
If you wish to cancel the setting results you have made,
*
click a title in the table of contents or “Refresh” in the
web browser menu.
NOTE:
A PC master station must be also registered as an IP unit. First
install the application (IS-SOFT) to a PC, then connect the PC to the
network and then register it.
Registering control units [System setting
– Control units composition]
Register all the control units (other than IP control units)
connected to the system.
Click
1
Control units composition in the table of
contents.
Click to check the radio button under "Connected" for
2
the unit you will register.
Click
*
Connection check
to con rm the connected units.
Connected: yellowish green
Not connected: gray
Shows a port no. of the central control unit to connect with
a room sub control unit or add-on control unit.
Shows the ID setting of the room sub control unit or add-
on control unit set by the ID setting switches. (Refer to the
INSTALLATION MANUAL
for the local system for details
about setting the ID setting switches.)
Shows a room sub control unit connected to an IP control
unit directly, so the port no. is not displayed. If you use
a room sub control unit connected that way, set this to
“Connected”.
Click
3
Temporarily stored
to save the current setting
results temporarily.
If you wish to cancel the setting results you have made,
*
click a title in the table of contents or “Refresh” in the
web browser menu.