


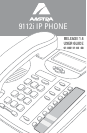


2 9112i IP Phone User Guide
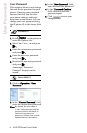
Getting Started
• Category 5/5e straight through
cabling
• Power adapter
Installation and Set-up
If your system administrator has
not already set-up your 9112i
phone, please refer to the Aastra
SIP IP Phone 9112i Installation
Guide for basic installation and
physical set-up of the 9112i. For
more advanced administration and
configuration information, system
administrators should refer to the
Aastra SIP IP Phone 480i/
480i CT/9112i/9133i
Getting Started
The 9112i must be set up and
configured prior to its first use.
This section describes phone
behaviour and start up screens you
may see when the phone is first
plugged in,
or when it is restarted.
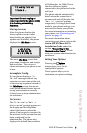
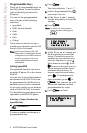
When You First Plug in Your
Phone
The 9112i automatically begins the
start up sequence as soon as it is
connected. The phone goes
through this process the first time
you plug in your phone and every
time you restart your phone. The
first screen the phone displays is
the Aastra splash screen.
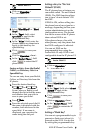
Updating Your Phone
After displaying the Aastra splash
screen, the 9112i checks settings
and looks for new configuration
and firmware updates for the
phone from the server. If a new
update is found, the phone
displays the message “Updating
Config” or “New Firmware”. This
may take a few moments while the
phone downloads the latest
updates.
Note: New updates to your phone can
be automatically scheduled from
the server. This is set up on the
phone system by your system
administrator and should be
scheduled during non-business
hours or slow call periods.