


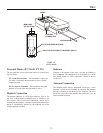
5. If talk is se lected the user will be asked to set the in ter -
com in and out lev els. If Lis ten is se lected the user will
be asked to set the lis ten level. Use the
<UP>/<DOWN> ar row but tons to ad just the lev els,
then press <SET> to ac cept the lev els. NOTE: In verted
char ac ter for the in ter com / lis ten lev els in di cates the
op tion is off. Af ter lev els are set the aux in put se lec -
tion is now ac tive.
6. The aux in put se lec tion will now be flash ing. Use the
<UP>/<DOWN> ar row but tons to se lect aux au dio
Yes or No. Press <SET> to ac cept the choice. Aux in -
put is selectable by but ton only. Set ting the aux in put
for but ton A to yes sets all in ter coms ac tive for that
but ton to yes, set ting it to no sets all in ter com ports for
no.
7. If aux in put was set to “Y” then the user will be asked
to set the aux il iary in put and out put lev els. Use the
<UP>/<DOWN> ar row but tons to ad just the in put and
out put lev els, then press <SET> to ac cept the lev els.
Press <MENU> once to go back to the sta tus screen or
press <SET> again to be gin the ed it ing of the screen
again.
8. On the “C” but ton there are two more selectable op -
tions: QB and RE LAY. If ac tive these op tions are in
nor mal char ac ters, if off the op tions are in in verted
char ac ters. Use the <UP>/<DOWN> ar row but tons to
se lect the op tion then press <SET> to ac cept the op -
tion.
QB = If ac tive, when the but ton C on the beltpack
is pressed, a 1000 Ohm path to ground is ac ti vated
at pin 15 of the male and female D-sub con nec tor in
the rear of the unit. This can be used to ac tive a
PTT on some ex ter nal ra dio sys tems. Au dio from
the beltpack and lo cal base sta tion’s head set is also
avail able at pin 15 only when QB is ac tive.
Re lay = If ac tive, when but ton C on the beltpack is
pressed, a re lay clo sure is ac ti vated on the rear of
the base sta tion.
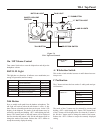
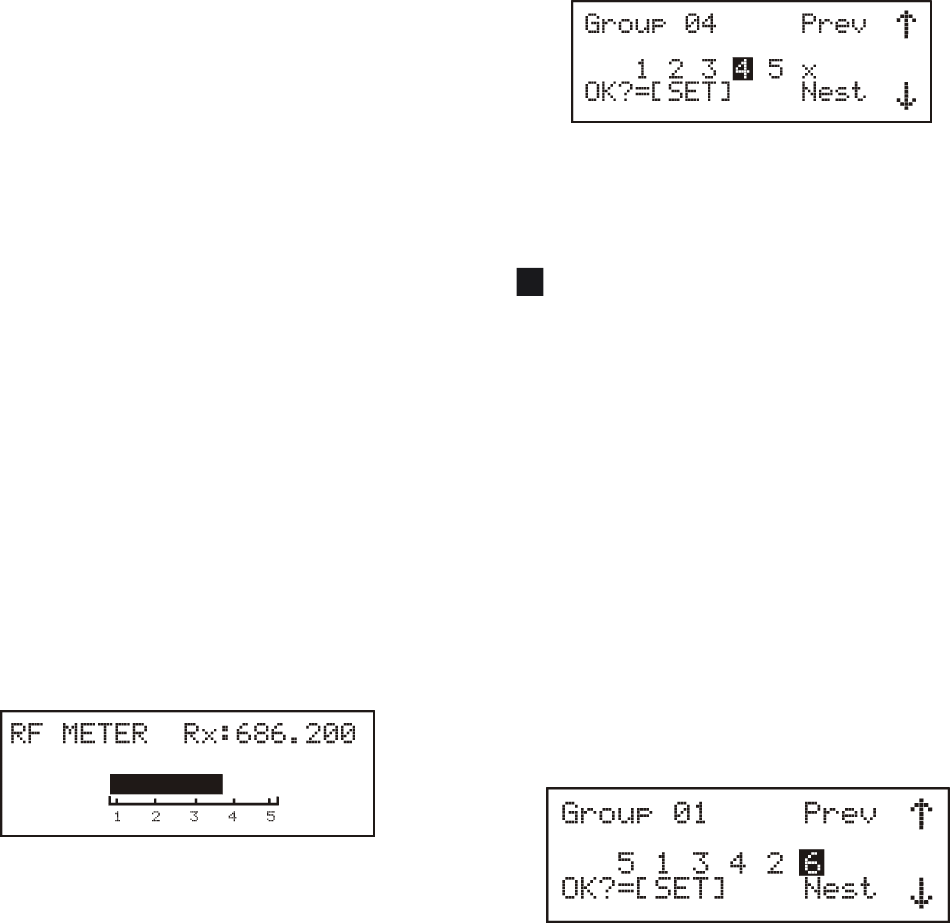
RF Me ter
This screen dis plays a larger ver sion of the 5 bars of re ceived
sig nal strength dis played on the sta tus screen. It also dis plays
the re ceive fre quency.
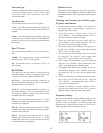
Chang ing to the RF Me ter Screen
1. From the sta tus screen hit <MENU> once to ar rive at
the se cu rity code / sys tem set tings / in ter com set tings /
RF me ter menu screen.
2. Se lect the RF me ter menu with the <UP>/<DOWN>
ar row keys and press <SET> to go to the RF me ter.
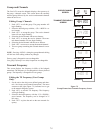
ClearScan™
Press and hold <MENU> + <SET> for 3 sec onds to en ter the
ClearScan™ menu. There will be three op tion from with to
choose from by us ing the <UP>/<DOWN> ar row but tons and
then press <SET>. Those op tions and the re sults are ex plained
be low.
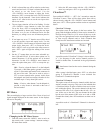
ClearScan™ Groups
This op tion scans all the groups in the base sta tion. The
group with the high est num ber of clear re ceive chan nels is
listed at the top of the list (<UP> ar row all the way to the
top). The next group down has the sec ond high est num ber
of clear re ceive chan nels and so forth. Chan nels that
clearly have RF in ter fer ence on them are in verted.
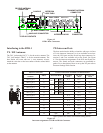
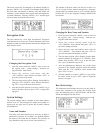
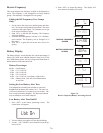
A pos si ble re sult of ClearScan™ Groups is shown be low:
x = No fre quency in that re ceive chan nel po si tion. It
would be dashed lines if ex am ined in the group/chan nels
screen.
= In ter fer ence found on the re ceive chan nel dur ing the
groups scan.
Af ter a group is de cided upon, press <SET> to se lect that
group. A ClearScan™ Chan nels is now ini tialed. See
ClearScan™ Chan nels de scrip tion.
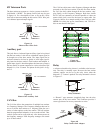
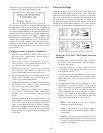
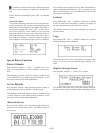
ClearScan™ Chan nels
This op tion scans all the receive chan nels within the base
sta tion's cur rently set group. This scan is also ini tialed af ter
a ClearScan Groups in or der to find the clear re ceive chan --
nels within that group. The re ceive chan nel with the least
amount of RF noise on it is listed at the far left (<UP> ar --
row all the way to the left). The next chan nel to the right
has the next least amount of RF noise on it and so forth.
Chan nel that clearly have RF in ter fer ence on them are in --
verted.
A pos si ble re sult of a ClearScan™ Chan nels is shown be --
low.
6-9
4