SpectraLink Corporation Link WTS Installation and Operation
Part Number: 72-0075-01-C-W.doc Page 46
13.2 The OAI Telephony Gateway’s Front Panel
The OAI Telephony Gateway’s front panel has the following status indicators.
• ERROR: indicates an internal error
• Status LEDS:
• LED 1: future use
• LED 2: future use
• LED 3/IPC: indicates the status of the communication between the OAI Telephony
Gateway and the other MCUs.
• LED 4/RD: indicates the OAI Telephony Gateway is receiving data on the RS-232
port.
• LED 5/SD: indicates the OAI Telephony Gateway is sending data on the RS-232 port.
• PWR: indicates status of DC power connection.
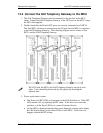
13.3 Mount Telephony Gateway to Wall
Like the MCU, the OAI Telephony Gateway is designed to be mounted on a backboard
of ¾ inch plywood, securely fastened to the wall. Mount the Telephony Gateway
vertically, adjacent to the last MCU. Do not stack the MCUs or Telephony Gateway on
top of one another.
To mount the OAI Telephony Gateway:
1. Using a 1/8” drill bit, drill four pilot holes, on 2 inch by 12.1 inch centers.
2. In each pilot hole, sandwich a star washer between the ESD bonding strap and the
backboard, then insert the screw (#8 panhead wood screw, 3/4 inch long) and
tighten it, leaving approximately 1/8 to ¼ inch gap from the wall.
3. Slide the Telephony Gateway over the screw until it drops in place.
4. Tighten screws fully.


