


Getting Started
17
US
Getting Started
To enter the local area code (For 10 digits
phone numbers users)
If a call matches one of the local area codes you entered, the phone
number will be registered with 10 digits in the Caller ID list (area code
+ number). If a call does not match one of the local area codes you
entered, the phone number will be registered with 11 digits in the
Caller ID list (1 + area code + number). Some regions of the country
allow you to have more than one local area code. (Up to five local area
codes can be entered in this phone.)
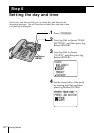
1 Perform steps 1 to 3 on page 15.
2 Select the number (“LOCAL 1” to “LOCAL 5”)
to enter the local area code by turning Jog Dial.
3 Press Jog Button (ENTER).
“ENTER LOCAL AREA CODE 1.” appears on
the display when you select “LOCAL 1” in step
2.
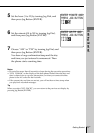
4 Enter the three digits of the local area code using
the dialing keys.
5 Press (PROGRAM).
You hear a long confirmation beep.
Notes
• If the local area code is already entered, it appears on the display in step 2. To
enter a different local area code, see “To change the local area code” on page
18.
• Do not allow more than 20 seconds to elapse during the operation procedure.
• If the local area code is not correctly entered, “SEND TO CORDLESS
HANDSET FAILED.” will appear on the display and five short error beeps
will be heard after (PROGRAM) is pressed in step 5. Move the cordless
handset closer to the base phone, and then start over the procedure.
Tips
• When you select “[GO BACK]”, you can return to the previous set display by
pressing Jog Button (ENTER).
• You may press Jog Button (ENTER) instead of (PROGRAM) in step 5.
• To check the current local area code, perform steps 1 and 2. The local area
code appears on the display for about 20 seconds.
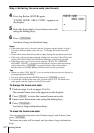
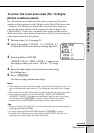
AREA CODE
HOME :
LOCAL 1:
LOCAL 2:
LOCAL 3:
continued