Using the Top-Level Menu
16
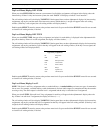
Top Menu Level, Call List Names
As mentioned previously, a flashing CALL indication occurs when there is an incoming call from a destination and there is no
key assigned to talk back to that destination. The destination name flashes in the call waiting window and is added to the call
list. You can then press the SELECT control to talk back to that caller. Later, you can turn the SELECT control to locate the
caller’s name and then tap the SELECT control to call that destination and talk again. Names are also added to the call list as
you select and use some of the other top level menu items described in the following paragraphs. For example, if you use the
P-P menu item to select an intercom port, and then use the SELECT control to talk to that destination, the destination will be
added to the call list. Whenever a new name is added to a full call list, the oldest name on the list is dropped. Thus, the call list
can change over time.
Top Level Menu, Display
General Description
When you select DISPLAY in the top level menu, you can access several menu items that display current information about
the keypanel using the key displays and the call waiting window.
Top Level Menu, Display, CHANS ON
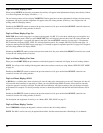
Select CHANS ON to view a list of all destinations that are talking to your keypanel. The call waiting window may briefly
display WA IT while the name are retrieved. The names can then be scrolled in the call waiting window by turning the
SELECT control. If there are no active destinations, N/A will display. You can use this feature, for example, to locate an inter-
com station that has accidentally left a talk key activated that is causing unnecessary noise at your keypanel. While that sta-
tion’s name is displayed in the call waiting window, press and hold the SELECT control to talk back and request that they turn
the key off.
• If you keypanel is assigned as the permanent member of a party line, CHANS ON will always display the names of all
other member of the party line.
Top Level Menu, Display, Exclusive
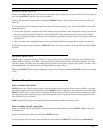
An Exclusive key will cause all active keys to turn OFF when activated. The keys that are turned OFF when the exclusive key
is activated will NOT turn back ON when the exclusive key is released.
1. Turn the SELECT knob to display, and then tap the knob.
2. Turn the SELECT knob to Exclusive, then tap the knob.
The Exclusive key’s Talk LED will light.
Top Level Menu, Display, Group (1-4)
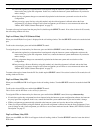
GROUP displays all keys that are currently assigned to groups. The group master key will flash green, and the other keys in
the group will be lit continuous green. The talk and listen indicators will light according to the way the keys have been pro-
grammed. For example, if the group master key normally activates both talk and listen, both indicators will flash green. If no
keys are assigned to a group NONE will display.
1. Double-tap the SELECT control to return to the previous menu level. Or, press and hold the SELECT control for about two
seconds to clear the call waiting window, if desired.
For assignment of keys to groups, see “Menus, KEY OPT, GROUP (1-4)” on page 36.


