Power-Up and Initial Settings
10
Setting the Address
1. While SET ADDR is displayed, tap the SELECT control.
ADDR 1 will display in the call waiting window.
2. Turn the SELECT control to display the address (ADDR 1 through ADDR 10) that you determined above.
3. Tap the SELECT control.
While the address is being stored, the alphanumeric displays and the call waiting window will show asterisks (****). Then,
the normal power-up indications will occur as described below. If you move the keypanel to a new port and need to change
the address at a later time, see “Menus, SERVICE, SET ADDR” on page 44.
Power-Up Indications
After the correct keypanel address has been set, SET ADDR will no longer display at power-up. Instead, the following indica-
tions will be given:
Keypanel with Alphanumeric Displays
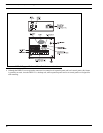
Alphanumeric Displays:
During a normal power-up, the alphanumeric displays will first show asterisks (****). After a few moments,
the intercom key assignments will display. If the keypanel cannot establish communications with the
intercom system, all alphanumeric displays will continue to show asterisks. Check the cable connection.
Unassigned Keys:
For each unassigned key, the display will show dashes (- - - -).
Keypanel without Alphanumeric Displays
The call waiting window will first display asterisks (****) then dashes (- - - -). If the keypanel cannot establish communica-
tions with the intercom system, the call waiting window will continue to show asterisks. Check the cable connection.
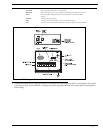
CALL / MENU Indicators
At power-up, the CALL and MENU indicators should be OFF.
HDST/SPKR/PGM volume indicator
At power-up, the selected Volume indicator is red, while the rest of them are green.


