Using Advanced Features
3.
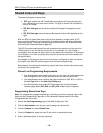
Press (UP) and (DOWN) to navigate through the entries until ENTRY
EMPTY appears
.
4. Press ADDNEW. PROGRAM ADDRESS? appears.
5. Press YES, and then enter the IP address or SIP URL of the contact.
Note: Press <−−− to delete characters.
6. Press SUBMIT. After the information is saved, PROGRAM NAME? appears.
7. Press YES, and then enter the name of the contact.
8. Press SUBMIT. After the information is saved, the name of the contact appears.
9. Press Superkey to return to the default display.
Modify a Phone Book Entry
1. Press Superkey, and then press >> until PHONE BOOK? appears.
2. Press OK. PHONE BOOK: <number of items> appears.
3. Press
(UP) and (DOWN) to navigate to the entry you want to modify.
4. Press CHANGE, and then press EDIT. PROGRAM ADDRESS? appears.
5. Do one of the following:
• To modify an address or a SIP URL, press YES, enter the address or SIP URL,
and then press SUBMIT. After the information is saved, PROGRAM NAME?
appears.
• To modify a name, press NO. PROGRAM NAME? appears. Press YES, enter
the name, and then press SUBMIT. After the information is saved, the modified
name appears.
6. Press Superkey to return to the default display.
Delete a Phone Book Entry
1. Press Superkey, and then press >> until PHONE BOOK? appears.
2. Press OK. PHONE BOOK: <number of items> appears.
3. Press
(UP) and (DOWN) to navigate to the entry you want to delete.
4. Press CHANGE, and then press DELETE. CONFIRM DELETE? appears.
5. Press CONFIRM. The entry is deleted, and ENTRY EMPTY appears.
6. Press Superkey to return to the default display.
Call a Phone Book Entry
• See Dial by Phone Book Entry on page 15 to call a Phone Book entry.
- 25 -


