


?
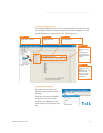
CONNECTING DEVICES
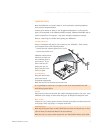
Move the TalkSwitch to a location where it can be attached to incoming telephone
lines and your telephone devices.
Connect phone devices as shown in the “Suggested Configuration” on the previous
page; this corresponds to the TalkSwitch default settings. TalkSwitch does NOT need to
remain connected to the computer - only when changing configuration settings.
Here are a few things to consider when placing your TalkSwitch:
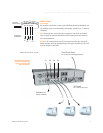
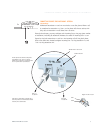
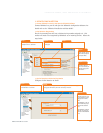
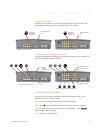
Incoming Phone Lines
Choose a convenient wall jack for you to attach to your TalkSwitch. Then connect
your telephone lines in the following manner:
- Connect the first incoming phone line to L1/L2.
- Connect the second to L2.
TalkSwitch 48-CA and 48-
CVA users can then con-
nect remaining lines to
L3/L4 and L4. If you
have 2 lines out of 1
phone jack, you can
plug it into the L1/L2,
and L3/L4 jacks.
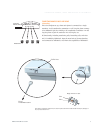
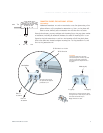
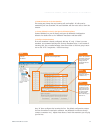
Local Extensions
Plug each internal tele-
phone into lines E1
through E8 consecutively.
Make sure the fax line has been put into E8 or E3.
It is a good idea to connect E4 to a phone, as this is the only extension that will
work during a power failure.
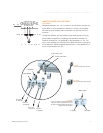
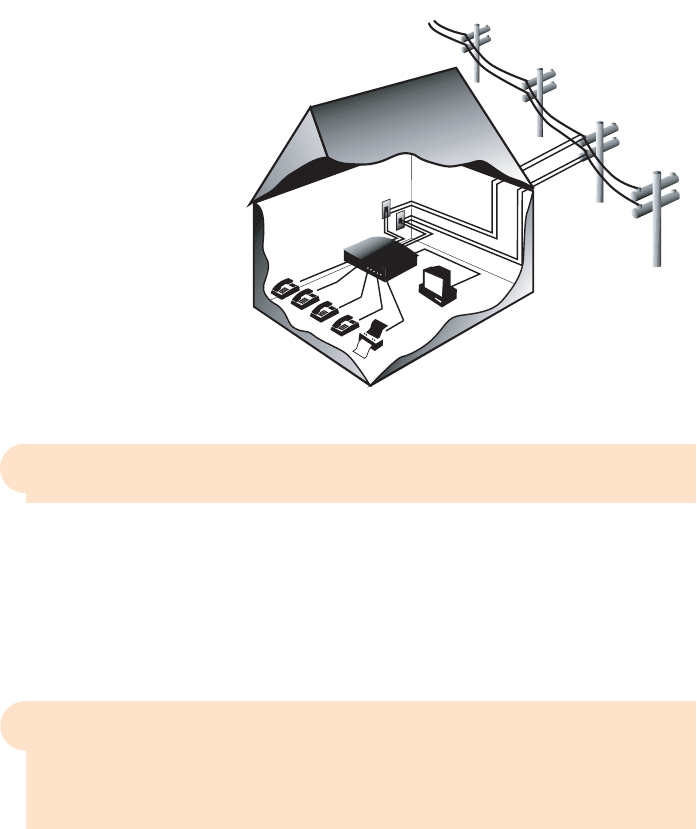
Location
Check out the location of electrical wall outlets and telephone jacks in the room. Place
TalkSwitch close enough to these items using your AC Adapter and telephone cords.
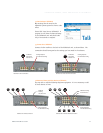
Music on Hold
Connect the 1/8" (3.5mm) phono connector from the music jack to an audio source such
as CD player, radio, tape player, or computer sound card.
Need Help Wiring?
Need help wiring your house or small office? Not sure where all the jacks are, or what
colors of wires you should use? Need to do some rewiring?
Make the most out of your phone system with our “Home/Office Wiring” Quick Guide.
WWW.TALKSWITCH.COM 2
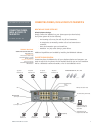
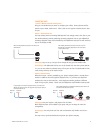
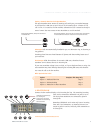
CONNECTING PHONES, FAXES AND DEVICES TO TALKSWITCH
TalkSwitch
System
!