


2. If you need to change the name, use the Left Arrow Line/Feature button and/or the Right Arrow Line/Feature
button to move the cursor to the right of the character(s) to be changed. Press the Backspace Line/Feature button to
remove the character(s), and re-enter the character(s). Or, press the Clear Line/Feature button to remove the name
entirely, then retype it.
3. Press Done.
o The Speed Dial Number Entry screen displays the prompt "Use dialpad to edit Number (<25)." with the cursor
positioned at the end of the Number field.
4. If you need to change the telephone number, use the Left Arrow Line/Feature button and/or the Right Arrow
Line/Feature button to move to the cursor to the right of the character(s) to be changed. Press the Backspace button to
remove the character(s), and re-enter the character(s). Or, press the Clear Line/Feature button to remove the number
entirely, then retype it.
Note: Pressing Cancel at any time returns you to the Speed Dial Main screen without updating the label.
5. Press the Save softkey to update the Speed Dial button.
o The Name/Number entry is added to an available Speed Dial button.
o All Speed Dial buttons are re-sorted in alphabetical order by Name.
o The Speed Dial Main screen is redisplayed.
6. To exit the Speed Dial application, press the Phone/Exit
button or select another application if applicable.
To add a call log entry to a speed dial button:
1. Access the Call Log application by pressing the Log softkey.
o The Missed Calls Main screen is displayed.
2. If the party for whom you want to create a Speed Dial button is listed on the Missed Calls Log, proceed to Step 4.
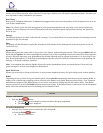
3. If the Missed Call Log does not list the party for whom you want to create a Speed Dial button, press the softkey for
that entry's Call Log (Outgo, InAns ).
o The Outgoing or Incoming Answered Call Log Main screen is displayed, as applicable.
4. Press the Line/Feature button to the left of the party for which you want to create a Speed Dial button.
o The Detail screen for that entry is displayed.
Note: If the AddToSD softkey is not displayed, you have the maximum number (48) of Speed Dial buttons labeled and
cannot add a new entry unless you remove an entry first.
5. Press the AddToSD softkey.
o The Speed Dial Editing screen is displayed, to allow you to make a change to the name or number.
o The prompt "Use dialpad to edit Number (<25)." is displayed, with the cursor positioned at the end of the
Number field.
6. Make any needed changes to the telephone number.
Note: Use the Left Arrow softkey, and/or the Right Arrow softkey to move the cursor to right of the character(s) to
be changed. Press the Backspace button to remove that character, and re-enter the correct character.
7. To change the name, press the Line/Feature button on either side of the Name field to move from the Number to the
Name field.
Note: Use the Left Arrow softkey, and/or the Right Arrow softkey to move the cursor to the right of the character(s)
to be changed. Press the Backspace button to remove that character, and re-enter the correct character.
8. Press the Save softkey to save the modified information on that Speed Dial button.
Note: To exit without saving, press the Cancel or Delete softkey.
o The Name/Number entry is updated.
o A Speed Dial buttons are re-sorted in alphabetical order by Name.
o The Speed Dial Main screen is redisplayed.
9. To exit the Speed Dial application, press the Phone/Exit
button.
To dial a party using a Speed Dial button:
Note: Automatic dialing of pre-stored numbers is the most common method of automatic dialing. You can set up Speed Dial
buttons and select the party you want to call by pressing that button. Because the IP telephone's advanced capabilities allow up
to 48 speed dial entries, speed dialing as described here is convenient and efficient.
1. Press the SpDial softkey at the bottom of the display screen.
o The first six Speed Dial buttons display, one name/number per button, and the prompt "Select entry to dial."
appears at the top of the display area.
4610SW IP Telephone End User Guide | 18 | Page