


14 Avaya Video Communications Systems User Guide
Configuring Camera Presets
A camera preset is a predefined camera position that is associated with a numeric key on
the remote control. Camera presets enable you to quickly change the position of the near
end camera during a call by pressing a single key on the remote control instead of using the
arrow and zoom keys. Far end participants see the video image without the delay that is
associated with using more than one key to position the camera.
You can configure and use presets in the Primary Input and Presentation Input screens
before placing a call and from any video screen during a call. To configure and use presets
during a call, you must first select Presets from the Call Manager screen. For more
information about using presets during a call, refer to “Using Camera Presets During a Call”
on page 30.
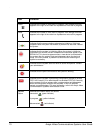
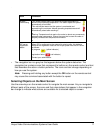
You can save nine presets. When presets are available for use, icons for the numeric keys
(0 through 9) followed by the word Presets appear in the navigation bar of the user
interface.
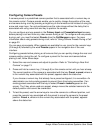
Configuring presets before placing a call ensures that you can quickly change the near end
camera position during the call. To configure a preset for the near end camera before
placing a call, follow these steps:
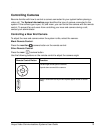
1. Select the near end camera and adjust its position. Refer to “Controlling a Near End
Camera” on page 13.
2. Press and hold a numeric key (1 through 9) on the remote control until you hear a beep.
The current position of the camera is associated with the key. Preset x saved, where x
is the numeric key associated with the preset, appears above the status bar.
If you choose a numeric key that already has a preset configured, it is overwritten. An
administrator can lock existing presets to prevent them from being overwritten. If an
existing preset associated with the key is locked, Preset x locked appears on the
screen. The 0 key, when used as a preset, always moves the selected camera to the
default position and cannot be overwritten.
3. To test the preset, use the arrow keys to move the camera to a different position, and
press the numeric key associated with the preset to move the camera to the preset
position. Preset x, where x is the numeric key associated with the preset, appears
above the status bar.