


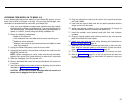
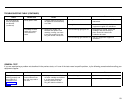


UPGRADING FROM MODEL 206 TO MODEL 410
If your needs expand beyond the capacity of your Model 206 system, you can
easily install a Model 410 system in its place. You can reuse the cartridges, voice
terminals and accessories that came with your Model 206.
1
2
3
4
5
6
7
Have your local telephone company add outside line(s) and network
interface jack(s) to those you already have. If you have building wiring
with modular jacks, have additional building wiring professionally in-
stalled, or install it yourself using the Wiring Installation Kit.
●
●
●
●
8
9
10
11
12
13
14
15
16
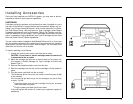
Obtain the following components:
Model 410 control unit
Line cords and line cord label pairs for each new wiring run
Additional voice terminals
Modular voice terminal cords and terminal cord labels for each
new voice terminal.
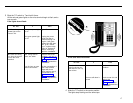
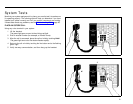
Unplug the Model 206 power cord from the ac outlet.
Unplug all the modular voice terminal cords and line cords from the
Model 206 control unit.
NOTE:
Before unplugging the cords, make sure they are accurately
labeled. Also, consult your system directory to make sure it is accurate.
Slide the cartridges out of the control unit.
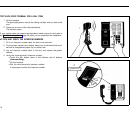
Remove the Model 206 control unit and put the Model 410 control unit
in its place.
Insert the cartridges into the new control unit following the instructions
described in “Installing Accessories,” page 19.
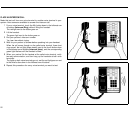
Plug your original line cords into the control unit line jacks that match
the cords’ labels.
Label new line cords at both ends with the letters associated with the
empty control unit line jacks.
Assign new intercom numbers to your voice terminals; 10 through 19
are the available intercom numbers with Model 410.
Label the modular voice terminal cords with their new intercom
numbers.
Plug your original modular voice terminal cords into the voice terminal
jacks that match the cords’ labels.
Install your new voice terminal wiring following the instructions in
“Voice Terminal Wiring,” page 12.
Assemble your new voice terminals and place them in their new loca-
tions. Add new intercom labels to voice terminals. Follow the instruc-
tions in “Connecting the Voice Terminals,” page 15.
Fill out a new system directory and attach it to the control unit door.
Refer to “What’s Next,” page 23, to find out where you can learn how
to administer and program your new Model 410 system to meet your
individual business needs.
CAUTION: Do not insert or remove cartridges when the control unit
power cord is plugged into the ac outlet.
25