IPedge
SoftIPT
IPedge UG 06/11 TOSHIBA 31
Configuring
SoftIPT
Configure the
SoftIPT
1. After you have installed SoftIPT, double-click the SoftIPT icon on the desktop.
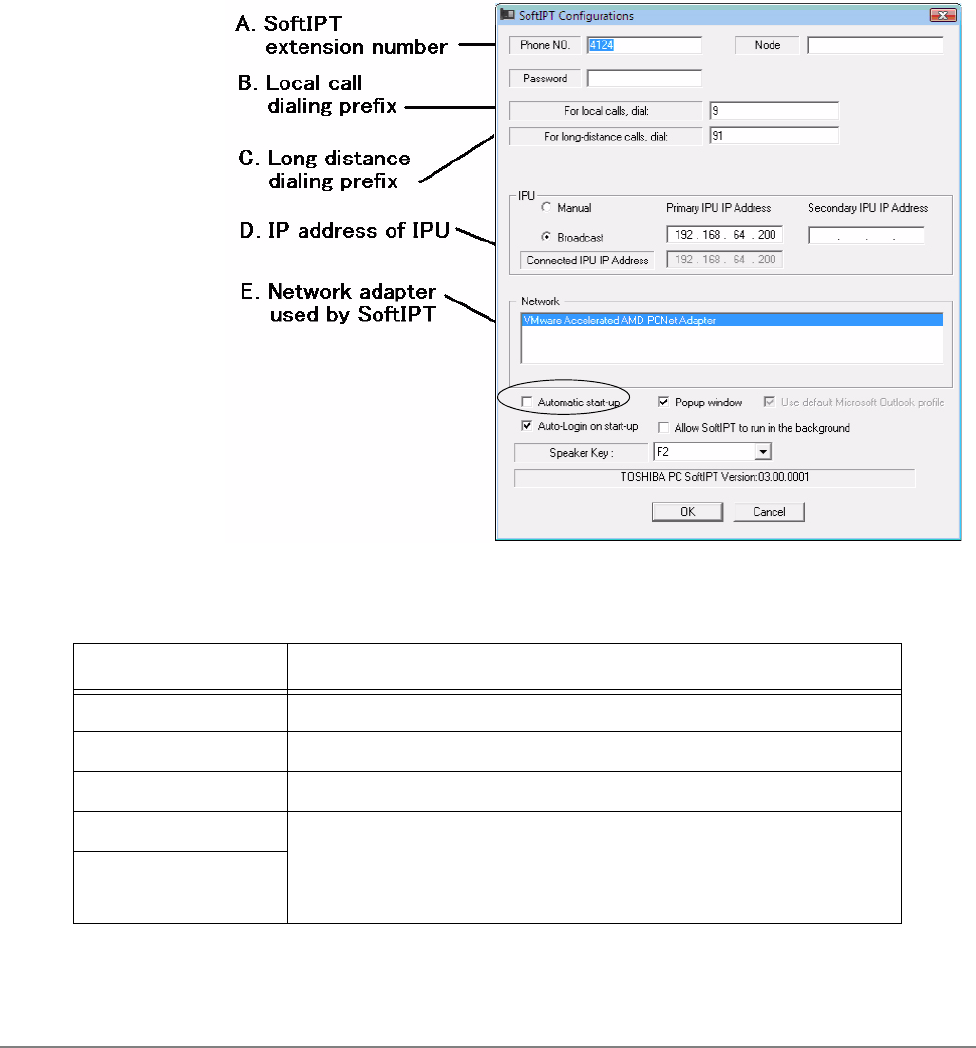
The SoftIPT Configuration window opens.
Important! See the illustration below. You will need to enter items A-E
to configure SoftIPT. Check with your Telephone System
Administrator to make sure that you have this
information. After entering this information, print the
screen for future reference.
Figure 1 SoftIPT Configurations
2. In the SoftIPT Configuration window, enter the following:
Fields Description
Phone No. This is the SoftIPT extension.
Password Password for IP user mobility
Node By default, leave blank.
Outgoing prefix When a call is made using the SoftIPT directory, SoftIPT
automatically attaches the outgoing prefix for local calls, or long-
distance prefix for long-distance calls, respectively. See “Using the
Directory” on page 3-35 for details.
Long distance prefix
