


Model 45 User Guide Issue Preliminary 2, March 2009
Studio Technologies, Inc. Page 17
external source of 24 volts is going to be
connected switch 1 should be placed in
its off (down) position. This ensures that a
failure of the connected 24 volt DC source
won’t cause the Model 45 to automatically
revert to pulling power from the intercom
circuit.
Some additional details might be helpful.
Be certain to allow only the connected
intercom circuit to supply power (switch 1
on) if it’s fully able to do so. Trying to draw
current from a circuit that’s not capable
of supplying the needs of the Model 45
will typically result in greatly degraded
intercom audio quality. This is because
the Model 45’s power supply circuit will
always attempt to draw the current it
requires. If it’s able to do so a constant
high-impedance load will be applied to the
circuit and everything will perform correct-
ly. But if the party-line intercom circuit isn’t
capable of providing the required voltage
and current the Model 45’s circuitry will
become unstable and negatively impact
the intercom circuit’s audio quality. Howls,
squeaks, and squeals are the expected
failure mode! No damage will be done
but intercom performance will be greatly
compromised.
In conclusion, the Model 45 can function
very well using the intercom circuit as its
power source. But this requires that the
circuit can meet the voltage and current
requirements.
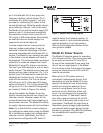
Model 45 Provides 2-Wire
Party-Line Power Source
Configuration DIP switch 2 is used to se-
lect whether or not the Model 45 will serve
as an intercom power source, providing
DC power and 200 ohm terminations to
the intercom interface. When switch 2 is
in its off (down) position the Model 45 will
not serve as an intercom power source.
This setting is appropriate when an exter-
nal intercom power supply is providing
power and terminations to the connected
2-wire intercom user devices. When switch
2 is in its on (up) position the Model 45
can provide the intercom power source,
with the requirement that an external
source of 24 volts DC is connected to the
Model 45.
Auto Null Button Operation
A pushbutton switch, located on the
Model 45’s front panel, is used to activate
the auto nulling functions. A configuration
parameter allows selection of the button’s
operation. The choices are dual auto null
mode and independent auto null mode.
When dual auto null mode is selected
a single “tap” (press and release) on the
pushbutton switch initiates a routine
that begins with channel 1’s auto null
sequence, followed immediately by
channel 2’s auto null sequence.
The independent auto null mode allows
the auto null function to be initiated for
each channel as desired. A single “tap”
will start the auto null routine for channel
1; two “taps” will start the routine for
channel 2.
When configuration DIP switch 3 is in
its off (down) position the dual auto null
mode is selected. This is provided spe-
cifically for cases where the Model 45’s
2-wire party-line interface will be used with
dual-channel intercom user devices. As an
example: the RTS TW-series provides two
independent audio channels, as well as
power, over a single 3-conductor cable.
In a case such as this it’s useful for both
of the hybrid circuits associated with an