


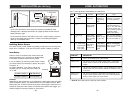
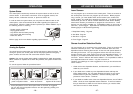
Disarming a triggered control panel
If "System Panic" is announced from the control panel after it has been disarmed,
that means the alarm was triggered when it was in armed mode. Follow the
procedures below to set the control panel back to standby mode.
1. If the alarm was caused by sensor(s), there will be flashing LEDs and
beeping indicating which sensor(s) triggered the alarm. You may want to
check the condition of the triggered sensor(s), the sensor(s) may be damaged
if there were break-ins.
2. You need to reset the sensor manually by triggering it twice, i.e. open and
then close a door / window sensor, or walk in front of the motion sensor. The
LED representing that sensor will stop flashing after it receives the signal
from the sensor.
3. You must now enter the password again on the control panel or press the
disarm button on the keychain remote, as an acknowledgement of the alarm
event. This will set the control panel back to standby mode.
Disarming under Duress
If you are forcibly compelled to disarm the control panel, you may enter the Duress
Password. Entering the duress password will terminate the entry delay, i.e. no
more entry delay beeping. But the control panel will silently call the emergency
phone numbers for help. The called party will hear the voice announcement
“System Panic”.
Note:
- The default duress password is [3838].
Note:
- The control panel can also be disarmed remotely when nobody is home, with a
touch tone phone. Please refer to “Remote Operation by Telephone” on page 27.
- If 3 consecutive incorrect passwords are entered, alarm will sound immediately,
the control panel will be in panic mode, and start calling the emergency phone
numbers.
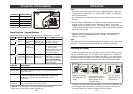
OPERATION
2. You must enter a valid password, either the Master Password, or Secondary
Password to disarm the system before entry delay expires.
3. When a valid password is entered, you will hear “System Disarmed” and the
entry delay beeping will stop, the ARM LED will be off.
–
22
–
–
35
–
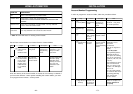
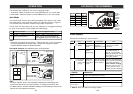
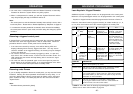
ADVANCED PROGRAMMING
ZONE LED DESCRIPTION
Off Zone is not occupied by any remote
Flashes twice This zone is occupied by another remote. Programming another
remote to this zone will overwrite the previous remote.
Flashes once This zone is occupied by a control module* (Optional).
You can still program a remote to this zone, and it will not overwrite
the control module* you have in this zone. (Refer to page 40 Home
Automation for more information)
Flashes once, This zone is occupied by a remote AND a control module*.
then twice If you program another remote to this zone, it will overwrite the
previous remote, but not the control module*.
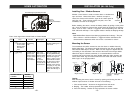
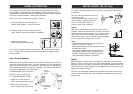
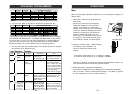
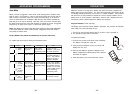
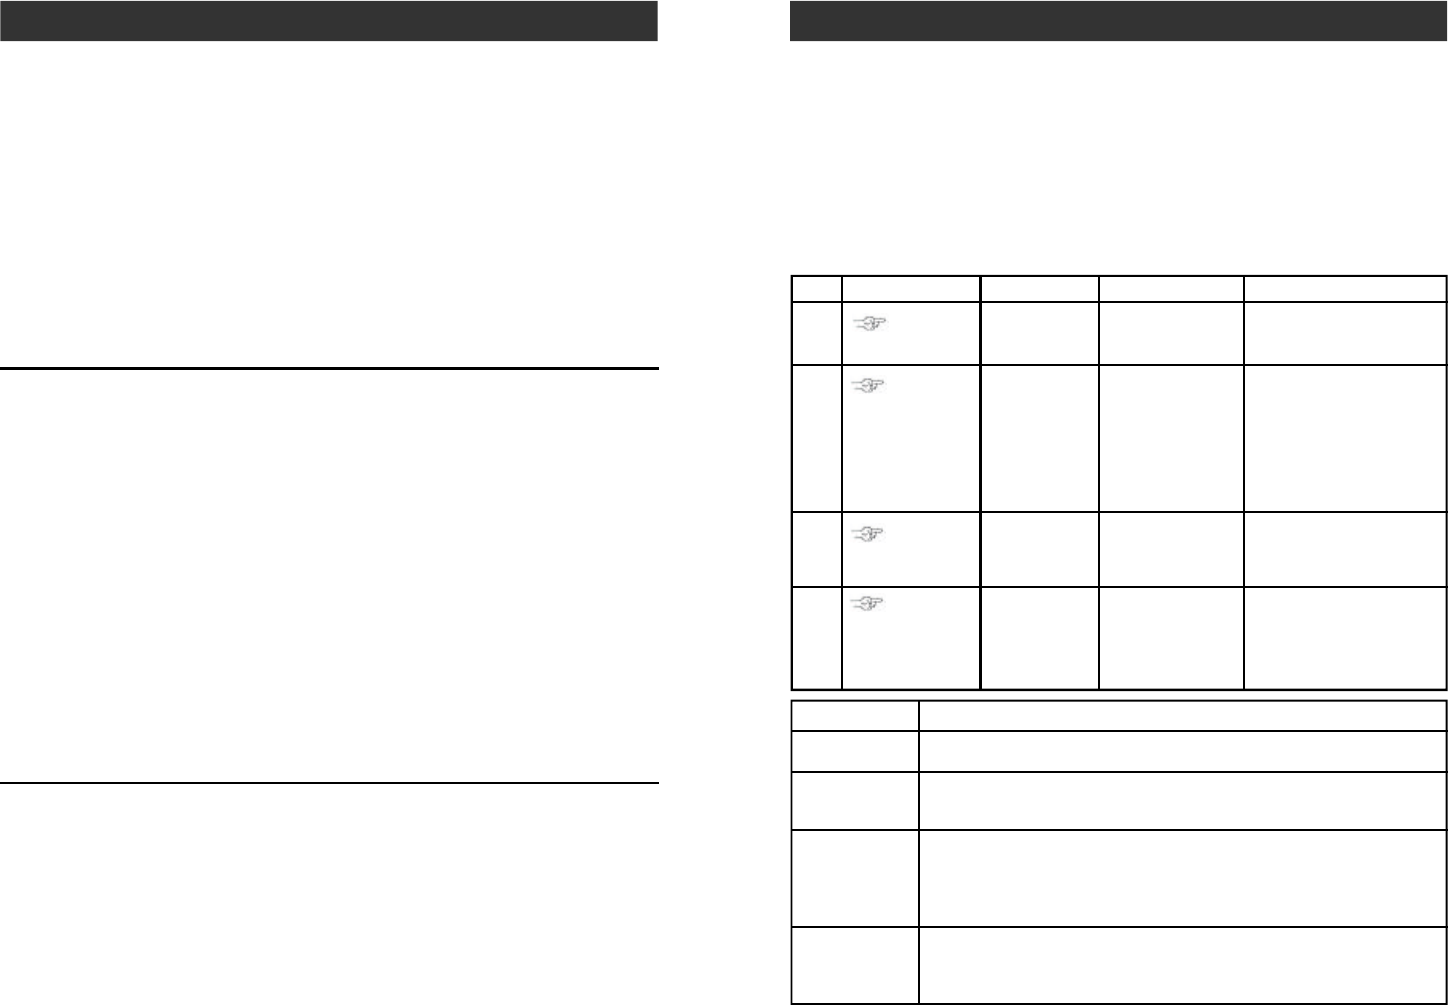
Learn Keychain / Keypad Remotes
Additional keychain or keypad remotes can be programmed to the control panel.
Maximum of 5 keychain/keypad remotes can be programmed to the control panel.
- Keychain or keypad remotes should be programmed to Device 6 to Device 0.
Follow the instructions below to program remote(s) to remote location(s) 6, 7, 8,
9, or 0, which is the bottom row of the numeric keypad of the control panel.
1
2
3
4
[PROG]
[MPIN]
Enter Program-
ming mode
Enter master
password to
programming mode
3 beeps for valid
password. 1 long beep
for invalid password.
[4]
Select learn
remote
programming
After [4] is entered, some
zone LEDs will flash or
stay off. The zone LEDs
represent whether that
zone is already occupied
by another remote.
** See Table A below.
[6] to [0]
Select remote
location
(Max. 5 remotes)
Select a remote
location [6], [7],
[8], [9] or [0].
After you have selected
the remote location, that
zone LED will be on.
Trigger remote Once the signal is
transmitted to the
Control Panel, that
signal which will
be stored.
You will hear
[Device X Accepted],
where “X” is the remote
location.
Activate the
remote by
pressing any
one of the
buttons.
** Table A: Zone LED status for learning keychain/keypad remote(s).
* Please refer to learn control module on page 40.
Step Keys Function Description Note