9
ASSEMBLING YOUR KEYSET
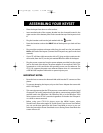
• Place the keyset face down on a flat surface.
• Insert notched ends of the support bracket into the channels located in the
upper section of the bottom panel.Push towards the top of the keyset to lock
in.
• Plug the handset cord into the jack marked with the symbol.
• Route the handset cord out the RIGHT side of the keyset as you look at it face
down.
• Plug an eight-conductor ethernet cable, from the wall, into the jack marked
LAN on the back of the keyset.(Connect the ITP keyset to any port on the local
network).
• If your ITP will share LAN connection with a PC, plug an eight-conductor eth-
ernet cable,from the PC, into the jack marked PC on the back of the keyset.
• Plug the power connector, from the power adapter provided, into the power
jack on the back of the keyset.The power adapter is not required if the ITP is
connected to a LAN connection that provides power over the ethernet.The
ITP-5112L supports the power over ethernet feature when it is connected to
a IEEE 802.3af compliant LAN switch or power injector port.
IMPORTANT NOTES:
• Be careful not to connect the Network LAN cable into the PC connector of the
phone.
• To prevent damaging the keyset,only use the Power Adapter that came with
the 5112LD keyset.
• This manual assumes that the ITP keysets are connected to a functioning local
IP network.The local IP network must be able to communicate with the MCP
and MGI card in the OfficeServ 100, OfficeServ 500, or in the OfficeServ 7000
Series systems over IP.This is assumed regardless of whether the IP keyset is
on a local or remote network.
• Before using your ITP-5112L phone, press the MENU button, select
Sound/Screen,then select option 8,“Screen Saver”.If you choose “User Define”,
you can set the time period for the Power Save Mode to occur or you can
select the interval the Power Save Mode occurs.During Power Save Mode the
screen will turn off.
5112l_guide.qxp 5/9/2006 9:18 AM Page 15


