


EN
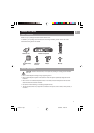
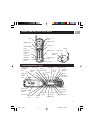
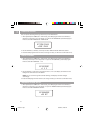
5. Insert screws from the INSIDE of the cabinet. If you did not countersink the drilled holes,
position the washers, flat side down, and place the screws in the holes.
If your cabinet does not have an overhang, go to Step 7.
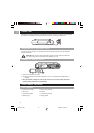
6. Hold the screw heads down while you push the selected spacers onto the screws under the
cabinet. Be sure to push spacers until they are firmly against the cabinet bottom and/or fully
nested (if more than one is used).
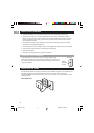
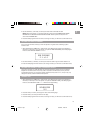
7. Align the unit under the screws. Hold the screw holes on the top of the unit against the
mounting screws and partially tighten the screws.
TIP: Do not fully tighten until all 4 screws are installed.
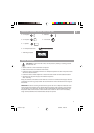
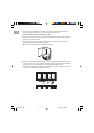
8. Extend the cord towards an electrical outlet and secure by using the cord hooks to hold the
cord out of the way. For a more attractive appearance, place the cord hooks at the back edge
of the cabinet (on or next to wall) directly over the electrical outlet to be used.
To attach cord hooks peel off the adhesive on the back of the hooks and attach to a clean, dry
surface on the underside of the cabinet or back wall.
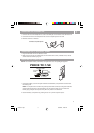
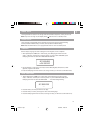
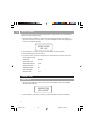
+
-
skip
tune/seek
review
radio
on•off
am•fm
radio controls
radio
presets
format
flash
prog
exit
speaker
+
-
CID
VOL
delete
cid
erase
play
stop
memo
message
answerer controls
channel
a
a
n
n
o
u
n
c
e
t
i
m
e
r
m
u
t
e
m
i
c
mic
T
A
L
K
C
A
L
L
B
A
C
K
c
h
a
r
g
e
MIN HOUR DAY/TIMECHECK
press to check/hold to change
RINGER HI LO OFF
Cord
hooks
11
os6976-en1.p65 5/20/2005, 12:09 PM14