


dmc3-4
www.mssystems.com | 800.421.1587 | www.mssystems.com
Page 15
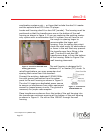
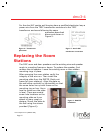
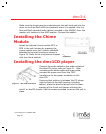
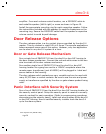
Figure 10 - Chime module
installation
Make sure the single gang box extends past the wall stud and into the
room so it will be flush with the sheetrock when it is applied. Run the
Red and Black shielded audio cables (included in the AWPRX) from the
master unit location to the AWP location. Connect the cables.
Installing the Chime
Module
Install the optional chime module MC3 or
MC8 in the wall housing by pressing the
chime module over the 4 plastic standoffs
attached to the wall housing as shown in
Figure 10. Refer to the instructions shipped
with the chime module.
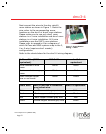
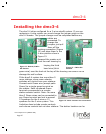
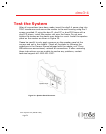
Installing the dmc1CD player
Connect the audio cables to the audio outlets of
the dmc1CD player refer to Figure 11. After
connecting the audio cables and main cable,
connect the power cord from the TE2C
transformer to the power connector on the
dmc1CD.
Ensuring that nothing is between the CD player
and the back of the wall housing (including
cables), place the dmc1cd player into the lower
opening of the finish out frames including the
dmc1F or dmcFM frames. Use the screws provided to secure the unit in
place.
Figure 11 - dmc1CD connections
$QEG$QEG 1.1.