


2 - 8 Dolphin® 9500 Series User’s Guide
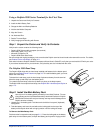
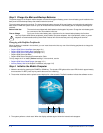
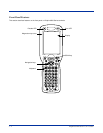
Step 3. Charge the Main and Backup Batteries
The power supply for the Dolphin mobile computer consists of two types of battery power: the main battery pack installed on the
back panel and the backup battery that resides inside the terminal.
The main battery powers the terminal. The internal backup battery charges off the main battery and maintains the application
data stored in RAM and system clock for up to 30 minutes when the terminal’s main battery pack is completely discharged or
removed.
Before Initial Use The terminals are shipped with both batteries discharged of all power. Charge the main battery pack
for a minimum of four hours before initial use.
Time to Charge Four hours for the main battery pack, eight hours for the internal backup battery the first time.
Use only Dolphin 9500 Series peripherals, power cables, and power adapters. Use of peripherals, cables, or power
adapters not sold/manufactured by Hand Held Products will void the warranty and may damage the terminal.
Charging with Dolphin Peripherals
When the battery is installed in the terminal, you can insert the terminal into any one of the following peripherals to charge the
main battery pack:
• Dolphin 9500 Series HomeBase (see page 12-1)
• Dolphin 9500 Series Mobile Base (see page 13-1)
• Dolphin 9500 Series ChargeBase (see page 14-1)
• Dolphin 9500 Series Net Base
• Dolphin 9500 Series Charging/Communication Cable
To fully charge the Li-ion battery before installing it in the terminal, use the
• Dolphin 9500 Series QuadCharger (see page 15-1)
• Auxiliary Battery Well of the Dolphin HomeBase (see page 12-5)
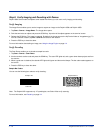
Step 4. Initialize the Mobile Computer
1. Wake the terminal by pressing the POWER or SCAN key. The decode LED lights and the scan LED blinks for approximately
three seconds. Do NOT press any keys while the terminal is initializing.
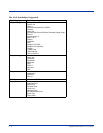
2. The terminal initializes and the splash screen displays for a few seconds. The Build numbers indicate the software version.
3. The system performs a hard reset. When the display activates again, follow the instructions that appear.
!
Build 8.XX 8.XX 8.XX
Bootloader
Kernel
Keyboard