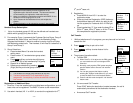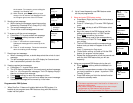
options: 0, 1, 2, and 3. Press SAVE to save selection. Default = 0.
c. Press “3” to select key volume when a key is pressed: use ¿orÀ to
scroll through 3 options: High, Low, and Off. Press SAVE to save
selection. Default = Low.
d. Press “4” to select key tone: use the ¿orÀ to scroll through 4
options: 0, 1, 2, and 3. Press SAVE to save selection. Default = 0.
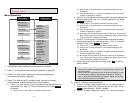
6. Press “5” to change handset settings:
a.
Press “1” to set dialing prefix:
(1) Use ¿orÀto scroll and select to turn on or off the dialing prefix feature.
Default = Off.
(2) If “On” is selected, the handset is prompted to enter a prefix, up to 14
digits.
(3) Use Delete and ¿orÀ scrolling key to edit prefix.
(4) When this feature is turned on, the LCD will prompt the user on each
outgoing phone call except during redial or dialing by pressing the
TALK key first whether to use the dialing prefix. The current prefix is
also displayed. Press Yes or No soft key to add the prefix to the
beginning of the number.
(5) This feature is useful for access code, calling card, and credit card
calls, etc.
b. Press “2” to Group Select: see Handset Group Subscription on page
31.
c.
Press “3” to select language
(1) Use ¿orÀ to select English, French, or Spanish. The default setting is
English.
(2)
Press SAVE to confirm your selection.
d.
Press “4” to clear call logs and phonebook:
(1) Press ‘1” and confirm to delete the entire phonebook.
(2) Press “2” and confirm to clear the three call logs (Called,
Received, and Missed).
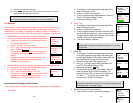
e. Press “5” to change the power-up LCD display to show, e.g.,
customer name or other greeting message:
(1) Use ¿orÀ to move the cursor backward or forward to insert (to the left
of the cursor) or delete (the character above the cursor, or left of the
cursor if cursor is on the right of the last character).
(2) Enter characters using the Character Table and method discussed in
the Phonebook section.
(3) When finished; press SAVE to save change.
f.
Press “6” to change LCD display contrast:
~44~
(2) When finished; press SAVE to save change.
g.
Press “7” to change the LCD backlight:
(1) Use ¿orÀ to scroll through options: On, Off, and 8 Seconds. Default =
8 seconds, meaning that the backlight will turn off the backlight after 8
seconds of inactivity.
(2) When finished; press SAVE to save change.
h.
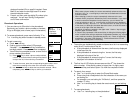
Press “8” to edit Call Barring
(1) Need to Enter Password to edit the call barring code to be executed.
The default PW is “0000.”
(2) Please refer to page 37 for detail operation.
i.
Press “9” to enable Name tag
(1) Use ¿orÀ to switch between On and Off. The default setting is Off.
(2) When finished; press SAVE to save change.
j.
Press “0” to program PBX features that you use frequently
(1) Program and save the most frequently used PBX function into DuraFon
system
(2)
Please refer to page 39 for detail operation.
7. Press “6” to register or de-register handset and base: See the detail
instructions on page 30
.
8. Press “7” to view inbox text message(s) or edit outbox text message(s).
See the detail instructions on page 38
.
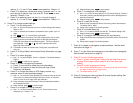
9. Press “8” to enter Call Manager setting.
a. Press “1” to edit “incoming call” setting. See the detail instructions
on page 32
(the page number needs to be revised after page
editing)
b.
Press “2” to edit “outgoing call” setting.
(1) Once activate Select BS function, you need to enter the base ID which
you want to choose for an outgoing call.
(2)
The default setting is OFF.
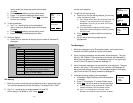
10. Press “9” following by entering a base ID to enter System setting. See
the detail instructions on page 34
.
(1) Use ¿orÀ to scroll through values 1 to 16. Pick one that is most
suitable to you. Default = 10.
~43~


