


11
Main Menu: ÇÈ
(1) Speak to the destination handset.
(2)
Press XFER soft key or the END to end announcement. The call is
transferred to the destination handset.
Notes: If the destination handset does not answer after handset
paging timeout, the call is routed back to the originating handset.
Call Manager
“Call Manager” feature allows the handset to be set to receive all incoming,
transferred, and 2-Way/Intercom calls OR just transferred and 2-Way/
Intercom calls. The option is selectable by base 1 to base 4. Besides, this
feature allows you to select a specific base station to make an outgoing call.
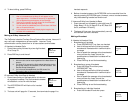
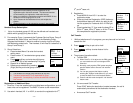
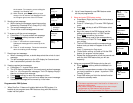
1. Decide whether to receive the incoming, transferred,
and 2-Way/Intercom calls from a specific base station:
a. Press menu 8 to enter the Call Manager function.
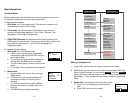
The screen will display:
b. Press 1 to enter “incoming” setting.
e
c. Us ¿ and À Scrolling keys to select a base from
base 1 to base 4.
d.
Then press the ÆYES NO key to switch between
Yes and No, then press SAVE key to confirm the
setting.
e. Repeat the process until all base stations from
which calls are to be accepted have been
selected for the handset.
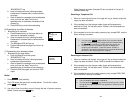
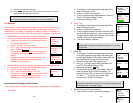
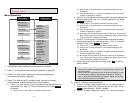
2. Decide whether to select a specific base station to make outgoing call:
a. Press menu 8 to enter the Call Manager function.
b. Press 2 to enter “Outgoing” setting.
c. Use ¿ and À to select either On or Off.
d.
Scroll to On and press SAVE if you want to select a
specific base station before you make an
outgoing call. The default setting is Off.
Change System Settings by Administrator
There are four types of system setting that can be adjusted by Administrator.
1. Dial Mode
11
Receive Calls
From base 1: ÇÈ
SAVE ÆYES NO
11
Main Menu: ÇÈ
8. Call Manager
9. System
11
Call Manager: ÇÈ
1. Incoming
2. Out
g
oin
g
11
Select Base
On
SAVE
~34~
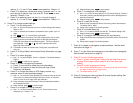
a. Press Menu-9 and enter the two-digit base ID to
enter the System mode.
b. Press 1 to enter Tone selection
c. You can adjust the dial mode between Tone and
Pulse. The default setting is Tone.
d.
The default setting is Tone.
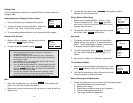
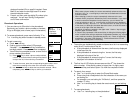
2. Flash Time
a. Press Menu-9 and enter the two-digit base ID to
enter the System mode.
b. Press 2 to enter Flash selection
c. You can adjust the flash time from 100ms to 900
ms (9 levels to choose from.) For example, press
“2” if the desired flash time is 200ms. You will see
“DONE” once you finish the setting.
d. The default setting is 600ms.
8. Call Manager
9. System
11
System: ÇÈ
1. Dial Mode
2. Flash Time
11
Flash(msec): ÇÈ
1. 100
2. 200
11
Done
Notes: If the base station is adjunct to a PBX system, it is
recommended to adjust the flash time of DuraFon 1X to match
the PBX spec.
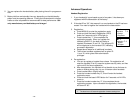
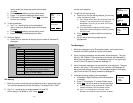
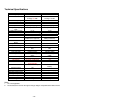
3.
Xfter PBX
a. This function is useful if the base station attached
to the PBX system through either the analog port
or the Digital Adaptor. Press Menu-9 and enter the
two-digit base ID to enter the System mode.
b. Press 3 to enter Xfter PBX setting mode
c. Use ¿or À scrolling key to switch between ON
and OFF. The default setting is OFF.
d.
Select ON and press SAVE key
e. You can key in the specific “call transfer” feature
code and press OK to confirm the setting. For
example, if your PBX is N brand, you need to key
in “Flash”+”*”+”70” as the call transfer code.
f. You will see a “DONE” confirmation.
Notes: Since the base station is adjunct to a PBX system, you need
to adjust the flash time of DuraFon 1X to match the PBX spec and
then program the “call transfer” code.
4. Set next Handset ID to be assigned
a. This function is useful if you want to assign a
11
System: ÇÈ
2. Flash Time
3. Xfter PBX
11
Xfer PBX: ÇÈ
On
SAVE
11
Xfer Code: ÇÈ
Flash*70
O K DELETE
11
System: ÇÈ
3. Xfter PBX
4. Assign Next
~33~
11
Please enter
Ext. #:**