


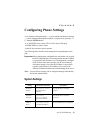

Alti-IP 600H Manual 18
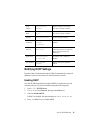
Remote Installation
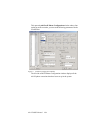
To install the Alti-IP 600H at a remote location, using a DSL connection
with or without a router hub:
1. Check the firewall settings at the corporate network to open TCP/UDP
ports required by the Alti-IP 600H. (For more information on firewall
settings, refer to “Firewall Considerations” on page 40.)
2. Check the AltiWare server’s IP extension settings (make sure the IP
extension is enabled, enough IP licenses are available, etc.)
3. Press * * 7 ENTER on the Alti-IP 600H phone to configure the
phone’s local IP address and Gateway IP address. (Depending on the
DSL provider’s recommendations, you may or may not want to use
DHCP.)
4. Configure the Alti-IP 600H phone’s AltiWare address.
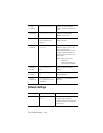
5. If NAT server is used, access NETWORK settings in the configuration
menu. Change ENABLE NAT setting to YES and assign the NAT
server’s public IP address in the NAT Address setting.
6. If configuring with an H.323 NAT router, the NAT router can forward
IP traffic to a specified private IP address based on the destination port
in the TCP/IP or UDP packets. When an H.323 endpoint is behind the
H.323 NAT, you should set up the forwarding to a private IP address
of this H.323 endpoint.
If this H.323 endpoint is AltiWare, the NAT router must be configured
to forward to following ports to the H.323 endpoints private IP
address:
• TCP port 10032 (for phone service)
• TCP port 1720 (for H.225)
• TCP/UDP 49152 ~ N (for H.245 and RTP/RTCP); where N =
49152 + (62 * number of VoIP boards) - 1.
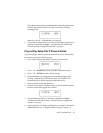
7. Use #27 + ENTER to initiate logging onto AltiServ.
8. The phone will attempt to register as shown in the LCD screen.