


Administrator Programming
IP Setup Instructions
106 Strata CIX IP5000-series Telephone UG 05/08
IP Setup Instructions
The following steps must be completed before starting the telephone setup. The IP
password will be assigned by the Telephone Administrator and is the verification step
of the telephone registration with the CIX (xIPU).
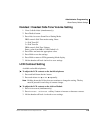
To enter the Password
1. Press
3+6+9+Hold (simultaneously).
2. Press
2, then press Hold for the Network Setting Mode.
3. Press
Next (for 20 button phone)
...or
Next Next (for 10 button phone).
4. Press
FB26, then enter the Password.
5. Press
Hold Hold.
6. Lift the handset off-hook / on-hook to save the settings.
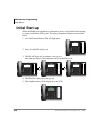
Telephone Setup
1. Press
3+6+9+Hold (simultaneously).
2. Press
2, then press Hold to select the Network Setting Mode.
3. Press
FB1 to see if the DHCP server is in use or not. Press one of the following
(normally, use
1: manual setting):
1: manual setting, then press Hold.
2: auto setting by DHCP server, then press Hold. Go to Step 7 below.
4. Press
FB2. Enter the IP address for this IP endpoint and press Hold. To enter the
period in an IP address, press the
*
button on your dialpad (e.g., if the IP address
is “192.168.1.241,” press
192
*
168
*
1
*
241).
5. Press
FB3. Enter the subnet mask number and press Hold. (e.g., if the subnet
mask address is “255.255.255.0, press
255
*
255
*
255
*
0).
6. If the IP endpoint is connected to a router or other gateway device, press
FB4.
Enter the router address, then press
Hold. Only used if Step 3, above, is set for
manual setting.
7. Press
FB5. Enter a Station ID for the IP endpoint and press Hold. This is usually
your telephone’s primary number (PDN).