


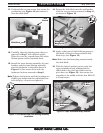


5. Remove the four set screws (see Figure 5)
from the saddle. These holes will be used to
mount the taper attachment to the saddle in
a later step.
6. Remove the lock nut (see Figure 5) from the
end of the leadscrew.
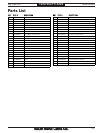
7. Keep the bearing parts together in the same
orientation as they were installed as you
remove them and the end bracket from the
leadscrew (see Figure 6).
Important: If a race is stuck to the surface of the
end bracket, use penetrating oil or mineral
spirits to separate the parts. Do not pry a
race loose, as this can damage it.
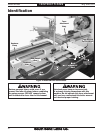
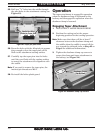
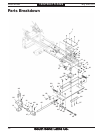
9. Loosen the set screw that secures the slide
block to the pivot pin, as shown in Figure 8.
Figure 8. Slide block removal.
Pivot
Pin
Slide
Block
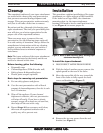
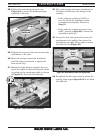
8. Remove the four flat head screws that secure
the top cover, then remove the cover (see
Figure 7).
Figure 7. Attachment body top cover removed.
Figure 6. Leadscrew end bracket removed.
Inner Bearing Assembly
Outer Bearing
Assembly
End
Bracket
!
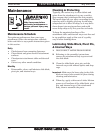
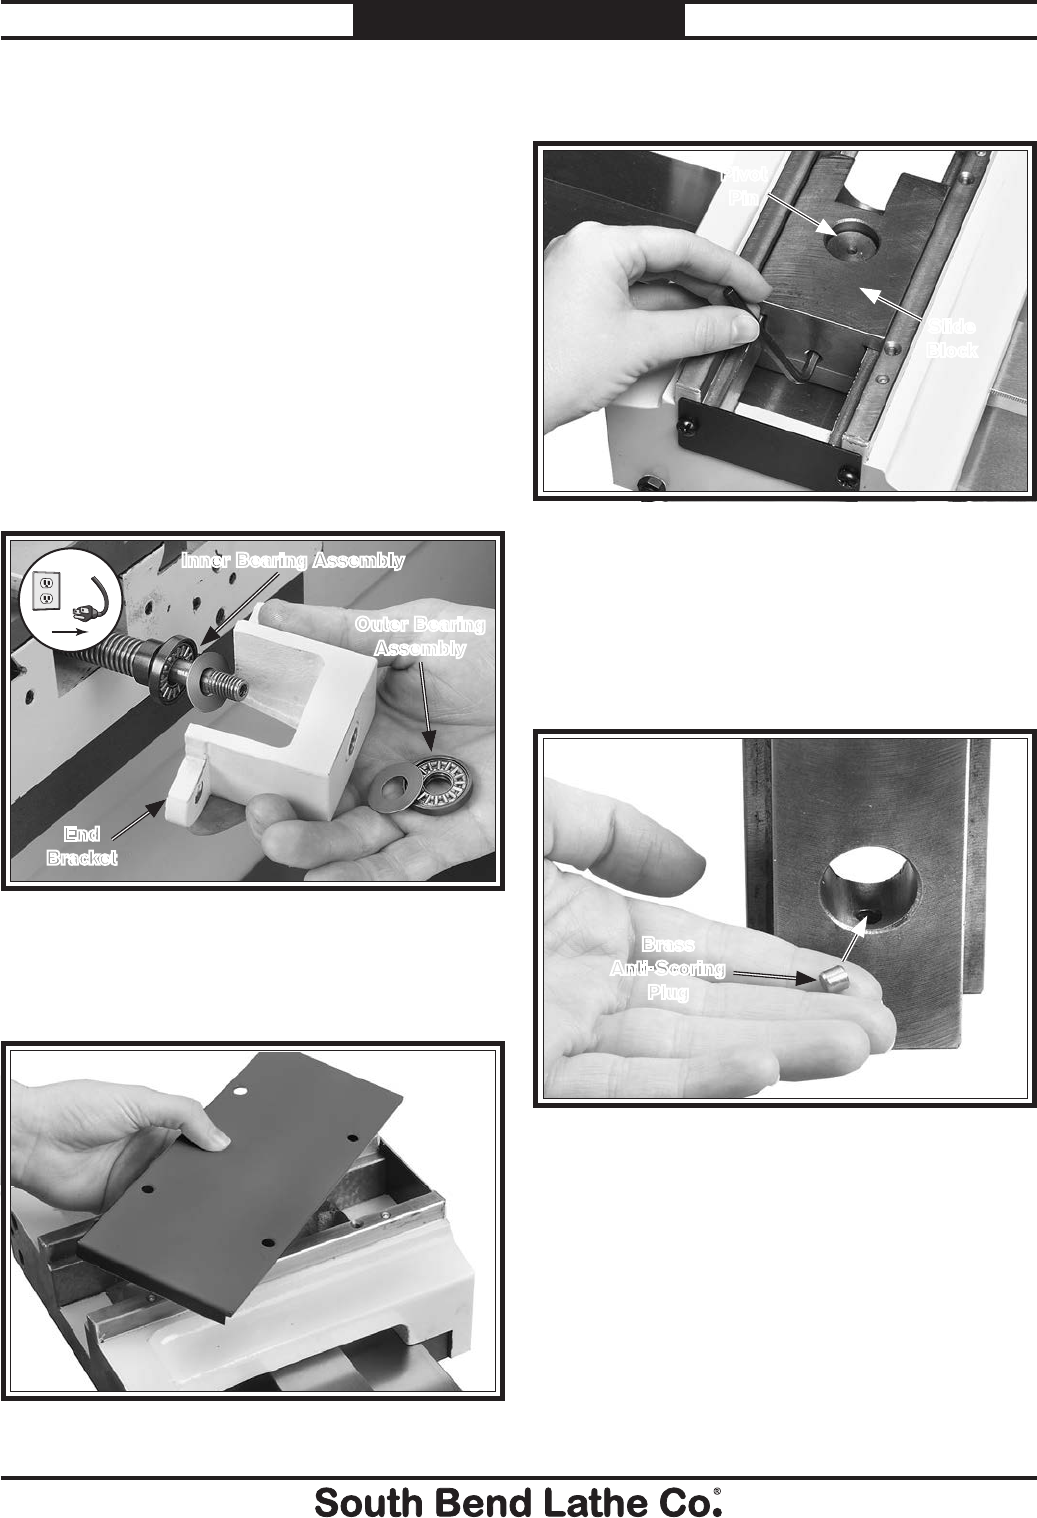
10. Lift the slide block off the pivot pin. Make
sure not to dislodge the brass anti-scoring
plug shown in Figure 9.
Note: If the anti-scoring plug falls out of the slide
block, use a dab of grease to hold it in place.
Figure 9. Slide block brass anti-scoring plug.
Brass
Anti-Scoring
Plug
Mfg. Since 9/11 Model SB1263
-5-
INSTRUCTIONS