


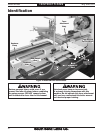

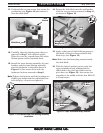


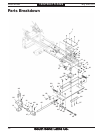


35. Drill two
19
⁄64" holes into the saddle through
the pilot holes in the attachment casting (see
Figure 23).
Figure 23. Taper pin pilot holes.
Pre-Drilled Pilot
Holes for Taper Pins
36. Ream the holes with the #6 spiral pin reamer
deep enough so that the taper pins will fit
flush to the attachment casting surface.
3 7. Carefully tap the taper pins into the holes
until they are flush with the casting surface
to secure the attachment tilt alignment with
the saddle.
Note: If you need to remove the taper pins, the
internal pin threads are M6-1.
38. Re-install the lathe splash guard.
Operation
The taper attachment is engaged for operation
when the deadman clamp is tightened on the
bedway and disengaged for operation when the
deadman clamp is loosened.
Engaging Taper Attachment
1. DISCONNECT LATHE FROM POWER!
2. Position the cutting tool at the proper
beginning position for the turning operation.
Note: Make sure that there will be at least 1"
clearance between the deadman clamp and
the saddle when the saddle is moved all the
way toward the tailstock (refer to Step 25 on
Page 8 for additional information).
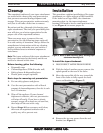
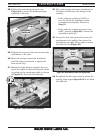
3. Tighten the deadman clamp cap screws to
secure the clamp and taper attachment to
the bedway (see Figure 24).
Figure 24. Deadman clamp cap screws.
Deadman Clamp
Cap Screws
-10-
Mfg. Since 9/11
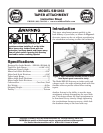
Model SB1263
INSTRUCTIONS