


3.15 Starting the PBX
Installation Manual 225
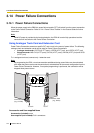
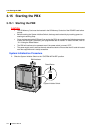
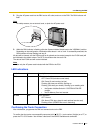
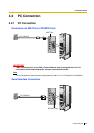
2. Plug the AC power cord into the PBX and an AC outlet, and turn on the PBX. The RUN indicator will
flash.
Note
For safety reasons, do not stretch, bend, or pinch the AC power cord.
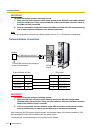
3. While the RUN indicator is flashing, slide the System Initialise Switch back to the "NORMAL" position.
Depending on the configuration, initialisation takes about 1 min to 3 min. If successfully executed, the
RUN indicator will stop flashing and stay lit.
All data will be cleared, and the PBX as well as all optional service cards (except for the IP-GW card) will
be initialised to the default values. The DPTs should show the time as 01:00.
The data of the IP-GW card will not be initialised.
Note
Use only the AC power cord included with the PBX for the PSU.
LED Indications
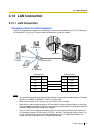
Confirming the Trunk Connection
After initialisation, programme the PBX and connect trunks to the PBX.
To confirm that the trunks are successfully connected, dial [ ] [3] [7] + trunk number (3 digits) on a PT, or
press the PT's S-CO button. You will hear a dial tone if the trunk is available and connected.
Indication Colour Description
RUN Green PBX status indication
• OFF: Power Off (includes normal reset)
• ON: Power On and running (on-line)
• Flashing (60 times per minute): Starting up
• Flashing (120 times per minute): Starting up or resetting with:
• the System Initialise Switch in "SYSTEM INITIALIZE"
position
• the SD Memory Card not inserted
ALARM Red Alarm indication
• OFF: Normal
• ON: Alarm (CPU stop, alarm for each optional service card)
• Flashing: Alarm (IPCMPR file error in restarting)
To AC Outlet