


only
8
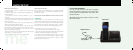
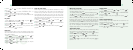
Your Touch answering machine is switched on and ready to
use within a few seconds of connecting to the mains
power. It has 3 mailboxes with up to 13 minutes recording
time (shared between the mailboxes) and can store up to a
maximum of 50 messages.
If you do not wish to use the mailbox feature, and just
use the Touch like a simple answer machine with all
the messages recorded in one place, you do not need
to do anything, and all messages will be recorded
in Mailbox one.
When using your Touch answering machine you will hear
helpful voice prompts to guide you through the operations.
When the answer machine keypad is idle, the backlight will
be off, and you must touch the keypad to wake it up before
it will respond to key presses.
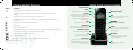
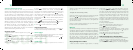
Switching the answer machine on/off
1 With the answer machine keypad active, press to
display and hear the current setting.
2 Press to switch between answering machine on and
off. The message counter displays ON or OF accordingly
and you will hear either “Answer machine is Off” or
“Answer machine is On”.
3 When the setting you require is announced and
displayed, wait for the answering machine to return to
standby mode.
If no buttons are pressed for 10 seconds the answer machine
will automatically return to standby mode. When in standby
mode, the answer machine’s digital display will show the
total number of new messages stored.
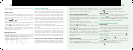
When switched on your Touch answering machine will
answer calls after a specific number of rings (ring delay)
and play callers the selected outgoing message (OGM). If
you have selected the ‘Answer and Record’ OGM, callers
can then leave a message for you in your mailbox which
you can listen to at a convenient time.
Messages can be up to 60 seconds long. The minimum
message length is 1 second. With the answering machine
switched on you can still make and receive calls as normal
until the answering machine takes a call.
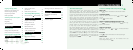
Answering machine menu structure
Ao - Set answer mode - Ring delay
C - Remote access code H - Set time
E - record OGM1/ OGM2 / Memo in mailbox.
9
USING THE ANSWERING MACHINE
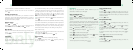
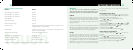
Clock Settings
Set the time
1 Press , then scroll or , or press to
select set TIME and press .
2 Scroll or , or press to select CLOCK
SETTING
and press .
3 Enter the time using the keypad, press to toggle
AM/PM (for 12 hour clock) and press to confirm.
Setting Caller ID Display Format
1 Press , then scroll or , or press to
select SET TIME and press .
2 Scroll or , or press to select DISPLAY
FORMAT
and press .
3 Scroll or to select 12/24 hour format and
press .
4 Scroll or to select DD/MM (day/month) or
MM/DD (month/day) format and press to confirm.
Set the alarm
The icon is displayed when the alarm is set.
1 Press , then scroll or , or press to select
SET TIME and press .
2 Scroll or , or press to select ALARM and
press .
3 Scroll or to select ON or OFF and press .
4 Enter the alarm time and press to confirm.
For 12-hour-format, press to toggle AM/PM.