5
IMPORTANT INSTALLATION INFORMATION
IMPORTANT: It is imperative you follow these steps in sequence for proper installation of the phone and note the following:
• Never install telephone wiring during a lightning storm.
• Never touch non-insulated telephone wires or terminals, unless the telephone line has been disconnected
from the network.
• Use caution when installing or modifying telephone lines.
• Without AC power, the Intercom and page functions will not operate.
• Without AC power and a properly installed battery, the flash function will not operate.
CAUTION: Always disconnect all phone cords from the wall outlets before battery installation or replacement.
INSTALLING AND REPLACING BATTERIES
1. If the line cords are connected, disconnect them from the base unit.
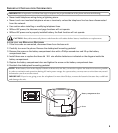
2. Carefully turn over the phone. Remove the desktop/wall mounting pedestal.
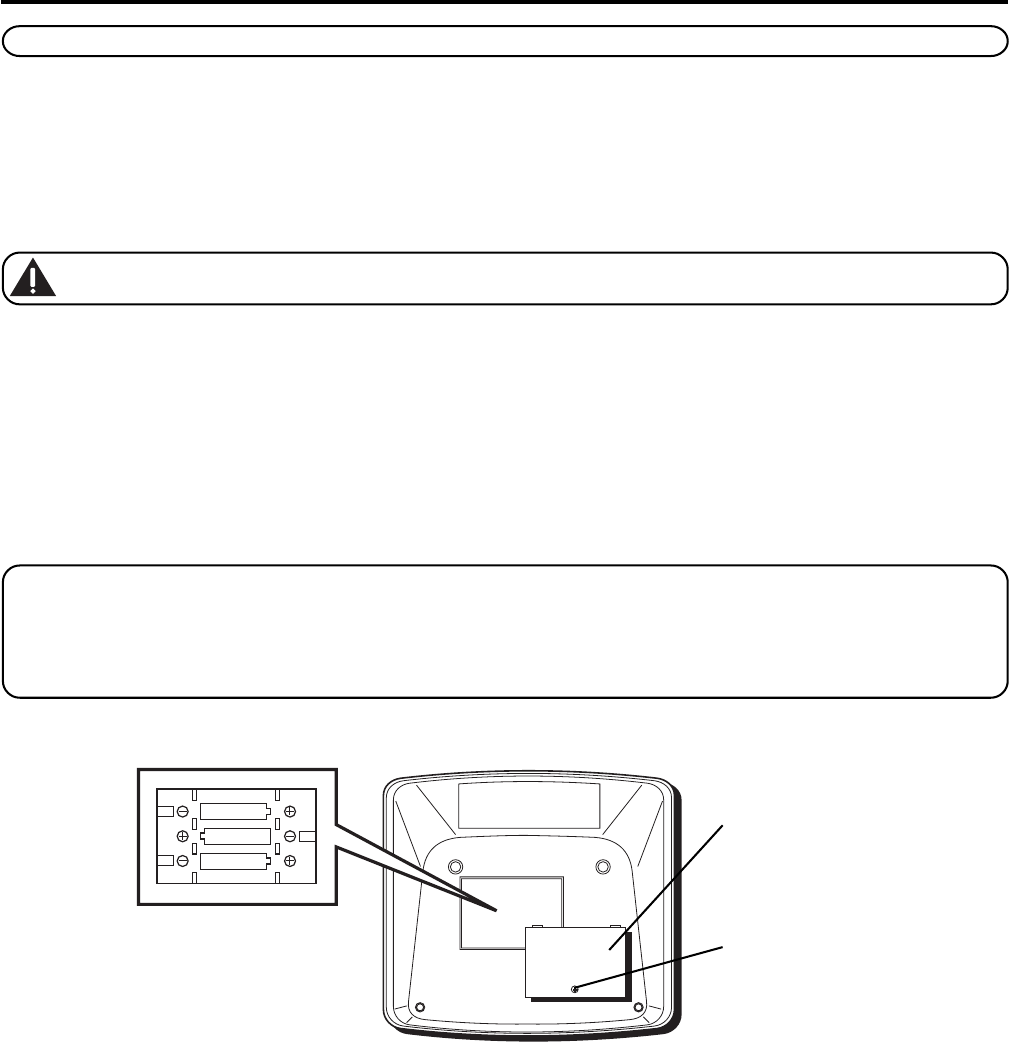
3. Remove the screw on the battery compartment door with a Phillips screwdriver and lift up the battery
compartment door.
4. Install three new or replace the three old 'AA' size alkaline batteries as indicated on the diagram inside the
battery compartment.
5. Replace the battery compartment door and tighten the screw on the battery compartment door.
6. Re-attach the desktop/wall mounting pedestal.
NOTE: If the battery icon in the display is blank or shows only one bar, you need to replace the batteries as soon as possible
in order to maintain unit operation during AC main power outage. As a precaution, you may want to write down any stored
information you do not want erased.
IMPORTANT: If you're not going to use the telephone for more than 30 days, remove the batteries because they could leak
and damage the unit.
“A A”
“A A”
“A A”
Battery compartment door
Screw


