Danish Interpretation Systems Installation Manual
Manual 01 19 60011
39
After installation of Software
Customer logo
The DIS logo in the CUA application can be exchanged with a customer logo.
Do the following:
1 Open the file "CUA logo background.bmp" with a graphics-editing program like ‘Paint’.
The file is found on the SW 6000 CD-ROM in the folder ‘SW6000 Accessories\Customer logos’.
The image in the file has the same colour as the background for the CUA application.
The image size is 214x162 pixels and the new logo has to have the same image size.
2 Open a new instance of ‘Paint’ and open the file with the customer logo.
3 Select the part of the logo which shall be used and select ‘copy’.
4 Insert the selected part of the customer logo into the background file and edit the colours if needed.
5
Save the file as: logo.bmp (24 bit)
6 Move or copy the just created logo file to the same directory where the CUA executable is placed,
normally ‘C:\Program Files\DIS\Conference User Application’.
7 When starting the CUA application now the customer logo has replaced the DIS logo
Creating Database Connections
If your CUA or CAA application on the PC shall have access to more databases you must check the checkbox
‘Create Hall Definitions’ when prompted during installation of the CUA, CAA.
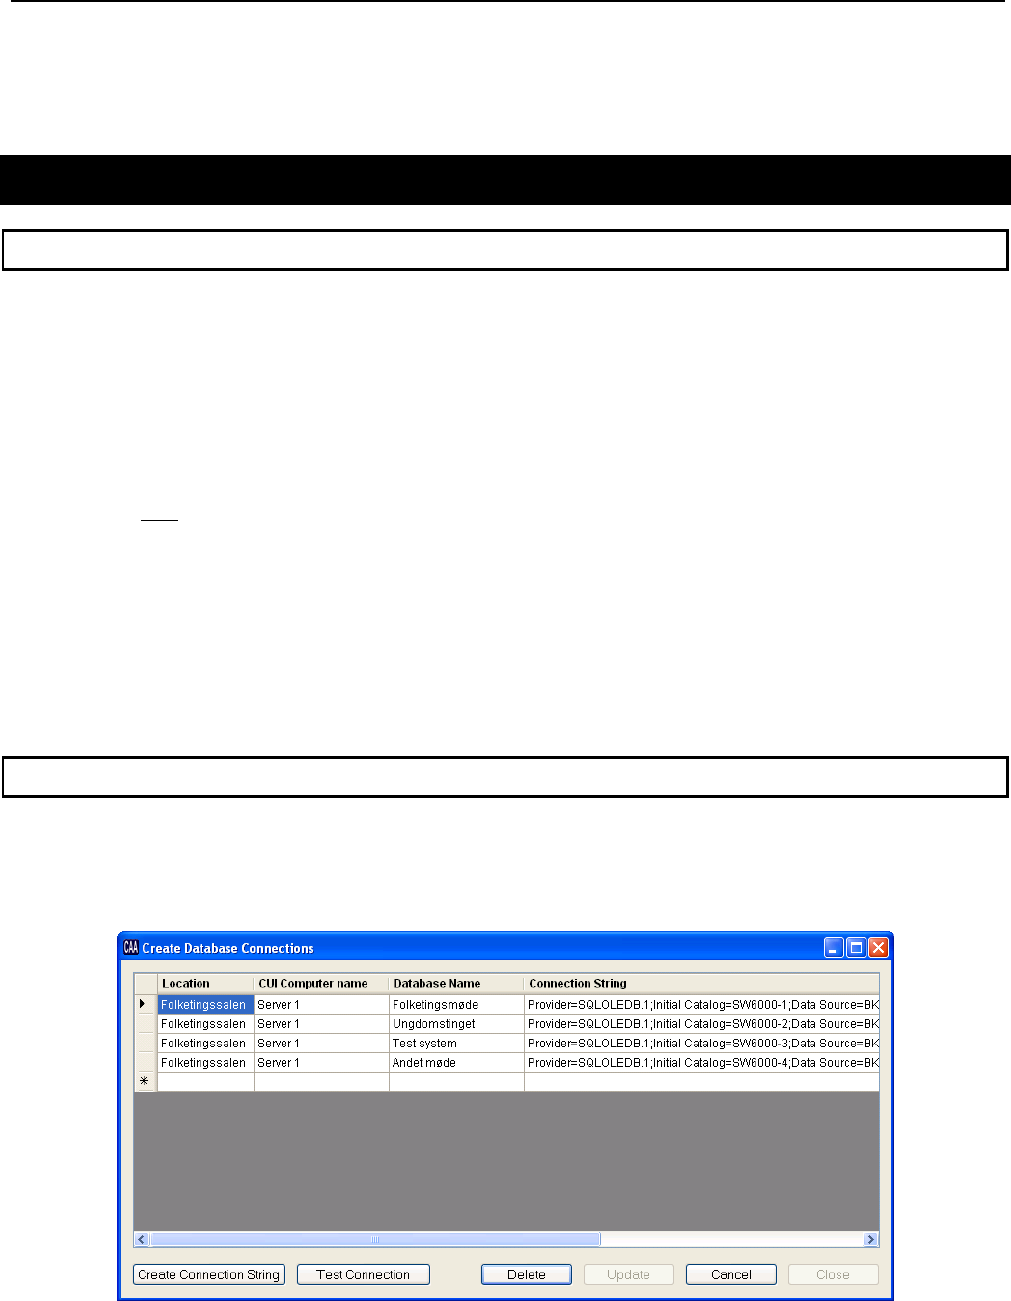
During the installation of SW 6000 software, if the ‘Create Hall Definitions’ checkbox is selected, it is time to set
the hall definitions, the following window will appear.
Inside the window there is a grid with 4 columns:
• Location: A description of the location of the computer, where the database is installed.


