5
Cisco Unity Express 8.6 Voicemail User’s Guide for Advanced Features
OL-23884-03
Voice-mail Options
Voice-mail Options
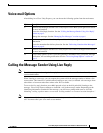
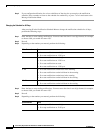
After dialing in to Cisco Unity Express, you can choose the following options from the main menu:
Calling the Message Sender Using Live Reply
Note To call the message sender using the live reply function, the function must first be activated by your
system administrator.
When listening to a message, you can request the system to dial the message-sender to initiate a live
conversation. This function is available when listening to new, saved, or deleted voice messages from
subscribers or from non-subscribers where caller ID is available.
To access the live reply function, press 44 (4 pressed twice) on the dial pad while listening to the
message. Cisco Unity Express attempts to establish a call to the message sender. Depending on the
identifying information contained in the message, you will hear a prompt with some or all of the
following: “calling <spoken name> at extension <calling number> at <remote location identifier>.”
Note If you activate this function, you will not be returned to your voice-mail session on termination of the
call. You must redial your voice mail access number.
Option Description
1 Listen to new messages. See the Cisco Unity Express Voice-Mail System Quick Start Guide
for more information.
Access the Live Reply function. See the “Calling the Message Sender Using Live Reply”
section on page 5.
Manage fax messages. See the “Managing Fax Messages” section on page 6.
2 Send a message. See the Cisco Unity Express Voice-Mail System Quick Start Guide for more
information.
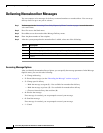
Access the nonsubscriber delivery function. See the “Delivering Nonsubscriber Messages”
section on page 8.
3 Listen to old messages. See the Cisco Unity Express Voice-Mail System Quick Start Guide
for more information.
4 Access setup options, such as voice-mail greetings, distribution lists, passwords, message
notification, and cascading notification. See the “Accessing Setup Options” section on
page 9.


