9
QSIG/DPNSS Phone System with Cisco EGW 2200 Integration Guide for Cisco Unity Connection 1.1
OL-8187-01
QSIG/DPNSS Phone System with Cisco EGW 2200 Integration Guide for Cisco Unity Connection 1.1
Testing the Integration
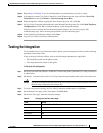
Step 24 Repeat Step 22 and Step 23 for all remaining phone system trunks that you want to create.
Step 25 If prompted to restart Cisco Unity Connection, in the Windows task bar, right-click the Cisco Unity
Connection icon and click Restart > Voice Processing Server Role.
Step 26 When prompted to confirm stopping the Voice Processing server role, click Yes.
Step 27 In Cisco Unity Connection Administration, in the Related Links drop-down list, click Check Telephony
Configuration and click Go to confirm the phone system integration settings.
If the test is not successful, the Task Execution Results displays one or more messages with
troubleshooting steps. After correcting the problems, test the connection again.
Step 28 In the Task Execution Results window, click Close.
Step 29 Log off Cisco Unity Connection Administration.
Testing the Integration
To test whether Cisco Unity Connection and the phone system are integrated correctly, do the following
procedures in the order listed.
If any of the steps indicate a failure, refer to the following documentation as applicable:
• The installation guide for the phone system.
• The setup information earlier in this guide.
To Set Up the Test Configuration
Step 1 Set up two test extensions (Phone 1 and Phone 2) on the same phone system that Cisco Unity Connection
is connected to.
Step 2 Set Phone 1 to forward calls to the Cisco Unity Connection pilot number when calls are not answered.
Caution The phone system must forward calls to the Cisco Unity Connection pilot number in no fewer
than four rings. Otherwise, the test may fail.
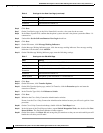
Step 3 To create a test user for testing, in Cisco Unity Connection Administration, click Users.
Step 4 On the Search Users page, on the User menu, click New User.
Step 5 On the New User page, enter the following settings.
Table 6 Settings for the New User Page
Field Setting
User Type User with Voice Mailbox
User Template <the applicable user template>
Alias testuser
First Name Test
Last Name User


