


22
© 2006 Avaya Inc. All rights reserved.
Additional Configuration Notes (Upgrading from very old
Cisco firmware releases) - Incremental Upgrade Steps
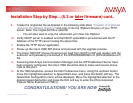
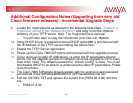
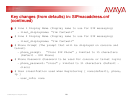
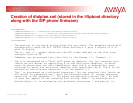
9. Create the ringlist.dat file as detailed in the following slide titled, “Creation of
ringlist.dat (stored in the /tftpboot directory)” and copy it into the /tftpboot
directory of your TFTP server. Note: The ringlist.dat file is optional.
– You will also want to copy the referenced .pcm files into /tftpboot
10. Verify DHCP server is enabled and that DHCP option#66 is provisioned with
the IP Address of the TFTP server hosting the above files.
11. Enable the TFTP Server application
12. Power-up the Cisco 7960 SIP phone and proceed with the upgrade process
13. If your were using static IP addressing, re-enter the IP parameters into the
phone one the upgrade process is complete since the upgrade to SIP 5.3 will
clear them. Note: The default password to “Unlock Config” is cisco. You must
first disable DHCP to be able to re-enter/save the static IP parameters. Power
cycle the phone.
14. The Cisco 7960 SIP phone should register with the extension and password
provisioned in the SIP000943665383.cnf (SIPmacaddress.cnf) file.
15. Edit the OS79XX.TXT and replace the current line (P0S3-05-3-00) with this
line
– P003-07-4-00