16
© 2006 Avaya Inc. All rights reserved.
Installation Step by Step…(5.3 or later firmware) cont..
9. Create the ringlist.dat file as detailed in the following slide titled, “Creation of ringlist.dat
(stored in the /tftpboot directory)” and copy it into the /tftpboot directory of your TFTP
server. Note: The ringlist.dat file is optional.
– You will also want to copy the referenced .pcm files into /tftpboot
10. Verify DHCP server is enabled and that DHCP option#66 is provisioned with the IP
Address of the TFTP server hosting the above files.
11. Enable the TFTP Server application
12. Power-up the Cisco 7960 SIP phone and proceed with the upgrade process
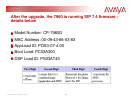
13. The Cisco 7960 SIP phone should convert itself from SCCP to SIP and register with the
extension and password provisioned in the SIP000943665383.cnf (SIPmacaddress.cnf)
file.
14. Assuming that Avaya Communication Manager and the SIP Enablement Server have
been properly configured, the Cisco 7960 should be able to make and receive phone
calls at this point.
15. At the 7960 telephone, access the Call Preferences menu. Using the up/down button,
move the highlighted selection to Speed Dial Lines, and press the Select soft key. The
Speed Dial Configuration menu will be displayed. Move the highlighted selection to the
desired speed dial button and press the Edit soft key to enter the CM provisioned
Feature Name Extensions (FNE’s).
CONGRATULATIONS! YOU ARE NOW


