


15
© 2006 Avaya Inc. All rights reserved.
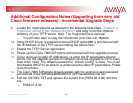
Installation Step by Step…(5.3 or later firmware) cont..
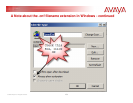
5. Rename the SIPmacaddress.cnf file to SIP + the MAC address of your 7960
SIP phone (the lab 7960’s MAC address is: 00-09-43-66-53-83). All alpha
characters are UPPERCASE
(the .cnf is lowercase)
– SIP000943665383.cnf
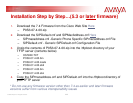
6. Make the edits detailed in the following slides titled, “Key changes (from
defaults) in: SIPDefault.cnf” – don’t forget to make the below changes, unique
to your environment
– proxy1_address, sntp_server, outbound_proxy, logo_url, messages_uri
– Verify: image_version is set to POS3-07-4-00
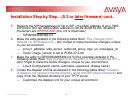
7. Make the edits in (SIP000943665383.cnf for this example) detailed in the
following slides titled, “Key changes (from defaults) in: SIPmacaddress.cnf”–
don’t forget to make the below changes, unique to your environment
– Line # Configuration (name, authname, password, display name)
8. Create the dialplan.xml file as detailed in the following slides titled, “Creation
of dialplan.xml (stored in the tftp directory along with SIP phone firmware)” and
copy it into the /tftpboot directory of your TFTP server
– Customize the dialplan.xml for your unique environment