


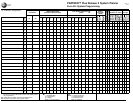

Telephone Programming
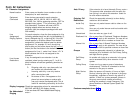
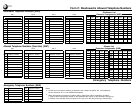
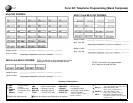
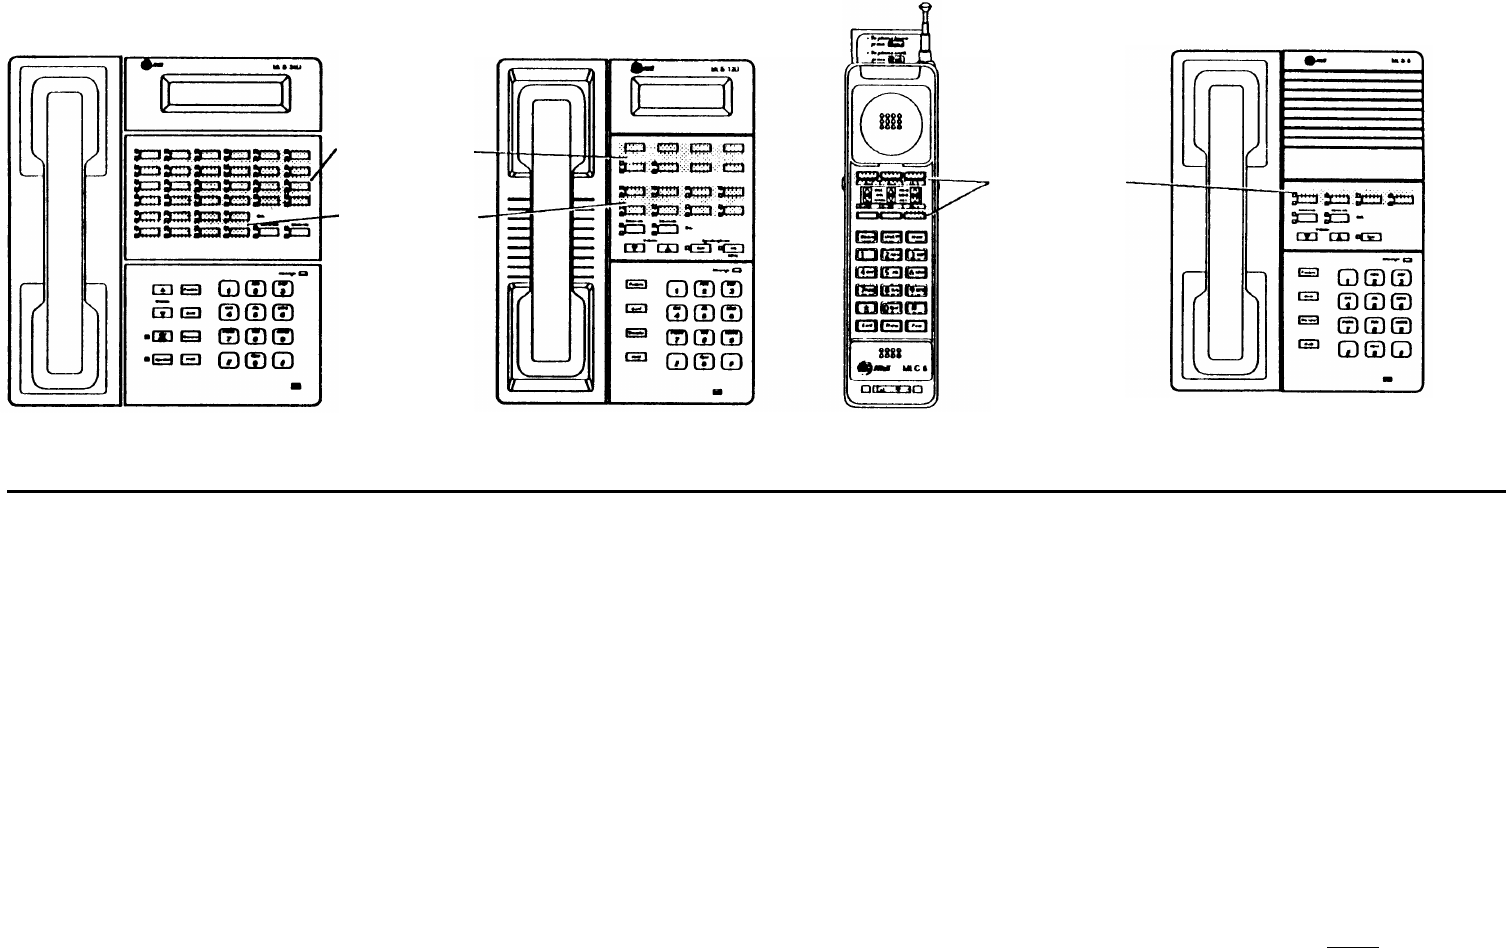
Use forms D1 and D2 to record the features and Auto Dial numbers for the programmable buttons of MLS-series and MLC-6 phones. Telephone buttons that can be
programmed depend on the type of phone, as shown below:
MLS-34D
Programmable
buttons
Any unused line
buttons are
programmable
MLS-12D and MLS-12
(MLS-12 has no display)
MLC-6
MLS-6
Any unused line
buttons are
programmable
NOTE: Standard touch-tone, rotary, cordless, and feature phones cannot be programmed
NOTE: An MLS-6 or MLC-6 phone with 4 lines assigned to it has no programmable
as described here.
buttons. That is, if it only has lines 1 and 2, the phone has two programmable buttons—the
buttons where “Line 3” and “Line 4” would have been.
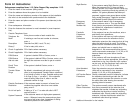
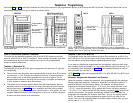
Form D1 Instructions (Standard Templates)
This form has two standard templates, one for an MLS-34D telephone and the
other for an MLS-12D or MLS-12 telephone. These standard templates show how
dial code features and Auto Dial numbers can be put on the programmable
buttons of system telephones.
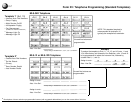
Template 1 (Extension 10)
This template shows an MLS-34D phone programmed for extension 10 (typically
the receptionist).
■
The top three rows of buttons are programmed with Intercom Auto Dial buttons
for extensions 11–28. This lets the receptionist dial any of those extensions
with a single touch, or see which extensions are busy at a glance. The 24
programmable buttons on the MLS-34D are enough to program all extensions
in your system as Intercom Auto Dial buttons.
■
The bottom row of programmable buttons show dial-code features that are
especially useful for the receptionist. For more information on these features,
see the instructions for form D2, or the Installation and Use guide provided
with the system. (If you have more than 18 extensions in your system, you can
program additional Intercom Auto Dial buttons on this row, to let the reception-
ist have one-touch access to all extensions.)
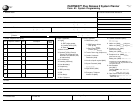
Template 2 (MLS-12 or MLS-12D)
This template shows dial-code features and Auto Dial numbers for an MLS-12 or
MLS-12D phone. The Do Not Disturb and Privacy features are programmed on the
first two buttons, since those features require buttons with lights.
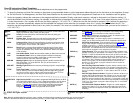
If you want any telephones programmed like this template, simply list their exten-
sion numbers under the template, or if you prefer different setups for phones, fill in
the completely blank templates on form D2. (If this standard template is close to
what you need, you can edit it.)
NOTE: Form D2 provides blank templates for MLS-12 or MLS-12D, MLS-6 or MLC-6, and
MLS-34D phones.
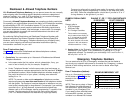
Extension Assignments/Automatic Line Selection
Under the template, indicate the extensions to be programmed like the template.
Directly under each extension, indicate its Automatic Line Selection setting, if it
should be different from the factory setting—for example, to indicate that an
extension should select outside lines 1, 2, 3, and 4, then select Intercom, enter
“1 2 3 4, I” under the extension. (On a system with 8 lines, the factory setting is
“1 2 3 4 5 6 7 8, I.”) When the user lifts the handset or presses [ Spkr
] without first
pressing a line button, the system automatically selects the first available line
assigned to the extension (for example, when line 1 is busy, the system selects
line 2). The extension can be programmed to select lines in any order (for ex-
ample, if the user has a standard phone or makes mostly intercom calls, you can
set the order to “I, 1 2 3 4 5 6 7 8”).