


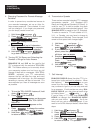

4. Continue your conversation by reading the
screen and talking into the handset.
5. Hang up both the TTY and telephone
when finished.
The DIALOGUE III TTY comes equipped with
help menus to assist you in using the various
features. These menus are especially helpful
when using the TTY when the users guide is un-
available or when only a quick reference is need-
ed. To activate the help menu:
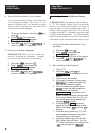
1. Hold down and press ? .
The primary help menu will scroll across
the screen and will be printed if the printer
is turned on. This menu lists the various
features and shows which keys are used
to access them.
2. Hold down and press any of the top
row function keys to view the help mes-
sage for that particular function. For
instance, holding down
and pressing
1 would display and print the instructions
for using the Phone Directory.
3. To exit from the help menu, hold down
and press or just
resume typing.
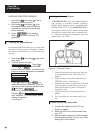
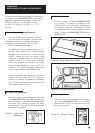
I. Using Acoustic Cups
For the acoustic cups to be operational, the
telephone line must NOT be plugged in. The
call signaler is not operational when the tele-
phone line is not plugged in.
1. Turn the TTY on.
2. Place the telephone handset into the
cups with the cord on the left.
3. Turn on your printer if you want to print
your conversation.
4. Dial the phone number using the tele-
phone.
5. When the party answers, begin your con-
versation in the usual way.
6. When the conversation is over, turn the
TTY off. Return the handset back to the
phone cradle.
J. Using Help Menu
CHAPTER 7
(CONTINUED)
K. Date and Time Stamping
Everytime you print or record a
conversation/message, it automatically records
the date and time at the beginning of your call,
presuming that the clock is set prior to this.
Follow these steps for setting the clock, and
remember that
NO RETURN KEY PRESS IS
NECESSARY IN THIS OPERATION. The
machine will jump automatically from step to
step, if the step was completed correctly.
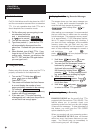
1. Hold down and press T to set
the built-in timer. It shows the current
timer settings, then it prompts you to
enter the current time
ENTER HOUR=MINUTE= .
(If you do not want to change, just hold
down and press twice
to return to normal TTY operation). Type
in hour, minutes-2 digits for each entry,
with no space or separation key in
between. For example, for 1:36 you would
enter 0136. Note: It will not accept a
time setting like 23:05, you have to
enter 11:05 PM
. After entering a group of
4 valid digits, it will prompt you for choos-
ing AM or PM:
ENTER AM/PM=. You have to
type A or P for your choice.
2. The clock screen prompts you now for
today’s date ENTER MONTH=DATE=YEAR= .
Again, the correct input is two digits for
each- month, day, year- without any sep-
aration character or space. For Example,
for July 8, 2000 you would enter 070800.
3. Once the last digit of the year setting
typed, the machine returns to the opera-
tion previous to the clock setting proce-
dure. To check the time, hold down
and press
T again, and the current set-
ting will appear on the screen. If you want
to change anything, hit ENTER until you
get to the screen you need, and follow
one of the steps above. If you want to go
back to your operation, hold down
and hit twice. (pressing
once will take you back to step 1)
4. The date and time clock will continue to
run whether or not the AC adapter/charg-
er is plugged in or not, presuming that the
battery pack is charged. To check the cur-
rent date and time hold down and
press T .
17