ADTRAN IP SoftPhone User Manual Using the Softphone
61950859L1-1A Copyright © 2006 ADTRAN, Inc. 21
Before Making a Call
Making calls with the ADTRAN IP SoftPhone is simple. There are, however, some differences between a
softphone and a traditional telephone.
1. A softphone is a computer application that must be running to make or receive calls.
2. The softphone software must log into the network before making or receiving calls. This
procedure may take a few seconds as the softphone logs into your VoIP account. Once the
softphone’s call status reads Logged in - Enter Phone Number it is ready to make or receive calls.
3. Since some calls are transmitted over the Internet, service quality may drop due to network
congestion. Although the ADTRAN IP SoftPhone includes advanced signal processing features to
mask the effect of such congestion, decreased voice quality may be noticeable during poor
network conditions. Most broadband connections provide adequate bandwidth for high-quality
voice transmission. If you experience poor audio quality during calls, refer to Appendix A:
Troubleshooting.
Logging into a VoIP Account
Upon starting the ADTRAN IP SoftPhone, when the dial pad first appears on screen, you will see the
messages Initializing, Performing DNS Lookup, followed by Discovering Firewall in the call status
screen. This normal ADTRAN IP SoftPhone behavior indicates that the softphone is discovering the
network environment.
After discovering the appropriate network environment, the message Awaiting proxy login information
may appear. This indicates that you need to enter VoIP service provider information (described in The
Settings Dialog on page 32) enabling the softphone to log into the network.
The ADTRAN IP SoftPhone allows you to configure the softphone to use more than one VoIP account.
Setting up the softphone for multiple providers is covered in SIP Accounts on page 32.
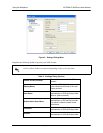
Figure 2 shows the ADTRAN IP SoftPhone Settings dialog, which allows you to enter and/or edit the
softphone settings. This dialog can be launched at any time by right-clicking on the main display window
and choosing Settings, or by pressing F8 on the keyboard. It is arranged as a tree with expandable branches
similar to Windows Explorer. When finished entering a group of settings, select
OK to save changes and
close the dialog. The Settings dialog is discussed in greater detail in The Settings Dialog on page 32.


