


Sheet 3
Note: For optimum battery life, charge all of your handsets completely before you connect the
telephone cord. The rst time you charge a new battery, allow 15 to 20 hours.
1-4. Connect the Telephone Cord
Note: If the telephone cord does not t into your telephone wall jack, contact your local phone provider for
assistance.
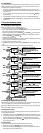
If you receive high-speed internet service through your
telephone line (referred to as DSL), you should install
a DSL lter between the telephone base and the wall
jack. Standard telephones often can’t operate correctly
without a DSL lter.
Testing the connection
13
Make a quick test call, and then press [END] to hang up.
What if the call doesn't go through?
Check to see if your telephone provider uses pulse dialing.
(See section 3-1 on System Options.)
What if there is a lot of static?
Check the sources of interference described in section
1-1 on Choosing the best location: is the base near
any of those?
1-5. Registering Accessory Handsets
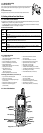
1-6. Things to Remember
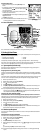
When you charge the handsets, the Caller ID summary screen and the
name of the handset appear in the display.
Lots of people put HANDSET #1 in the base, but it doesn’t matter which
handset you put in the base and which one you put in the charging
cradle.
Now your phone is ready to use!
•
•
8
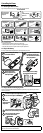
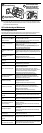
Place one handset in the base and the other in the charging cradle.
What if the charge LED doesn't
light up?
• Check AC adapter connection.
• Make sure you are not using
an outlet that's controlled by
a wall switch.
Make sure that the
charge/in use and
LEDs illuminate.
8
Place one handset in the base and the other in the charging cradle.
What if the charge LED doesn't
light up?
• Check AC adapter connection.
• Make sure you are not using
an outlet that's controlled by
a wall switch.
Make sure that the
charge/in use and
LEDs illuminate.
9
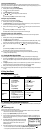
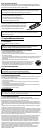
Connect the telephone cord to the TEL LINE jack on the rear of the base.
11
10
Connect the telephone cord
to a telephone wall jack.
Route the cord through
the hole in the stand
and into the molded
wiring channel.
To telephone
wall jack
Telephone cord (supplied)
To TEL LINE
9
Connect the telephone cord to the TEL LINE jack on the rear of the base.
11
10
Connect the telephone cord
to a telephone wall jack.
Route the cord through
the hole in the stand
and into the molded
wiring channel.
To telephone
wall jack
Telephone cord (supplied)
To TEL LINE
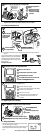
Telephone
wall jack
Telephone cord
DSL filter
Telephone
wall jack
Telephone cord
DSL filter
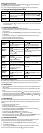
12
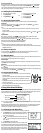
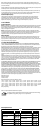
Pick up the handset from the base and press [TALK/flash].
You should hear a dial tone, and the display should show TALK.
What if I can't hear a dial tone?
Check the telephone cord connection on the base.
What if the display doesn't show TALK?
Put the handset back in the base for at least five seconds.
Make sure the charge/in use LED flashes.
Talk 0:01
12
Pick up the handset from the base and press [TALK/flash].
You should hear a dial tone, and the display should show TALK.
What if I can't hear a dial tone?
Check the telephone cord connection on the base.
What if the display doesn't show TALK?
Put the handset back in the base for at least five seconds.
Make sure the charge/in use LED flashes.
Talk 0:01
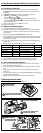
14
15
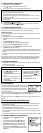
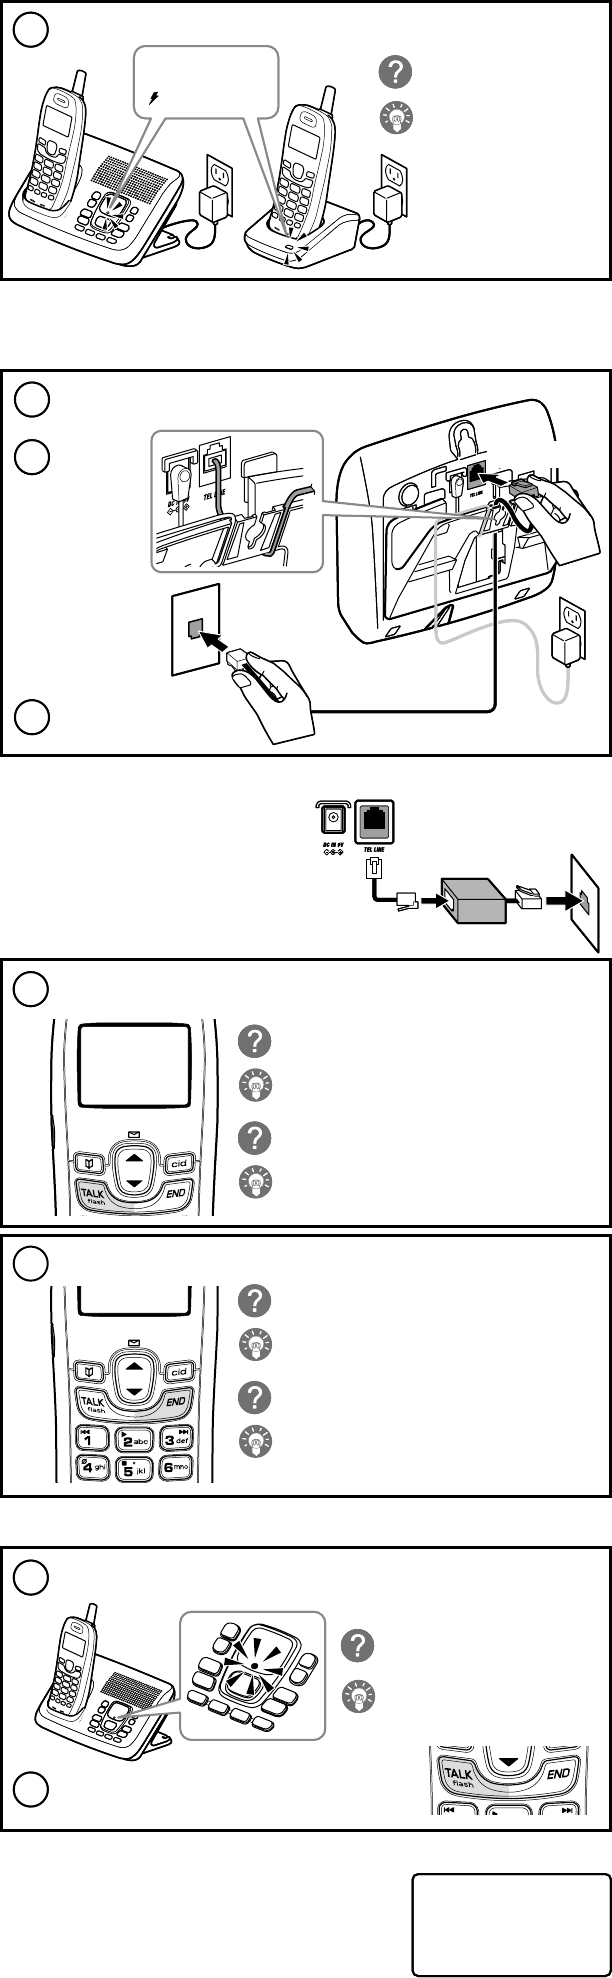
One by one, put each additional handset in the base.
The charge/in use LED should flash as the base recognizes the handset.
Wait at least five seconds, then pick up the handset and press
[TALK/flash]. Make sure you can get a dial tone on each handset.
What if the charge/in use LED
doesn't flash?
Pick the handset up and put it back
in the base.
14
15
One by one, put each additional handset in the base.
The charge/in use LED should flash as the base recognizes the handset.
Wait at least five seconds, then pick up the handset and press
[TALK/flash]. Make sure you can get a dial tone on each handset.
What if the charge/in use LED
doesn't flash?
Pick the handset up and put it back
in the base.
HS1
New :01
Total:17
HS1
New :01
Total:17