


Sheet 12
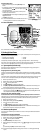
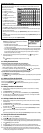
8) Using the Answering System While You're Away from Home
When you are away from home, you can operate your answering system with any touch-tone telephone.
8-1. Programming a Security Code
You must set a two-digit security code in order to access your answering system from another telephone.
Press [menu/clock] on the base to open the answering system menu. The voice prompt announces the
rst menu item.
Press [menu/clock] repeatedly until you hear the voice prompt announce “Security code”.
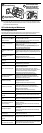
Use [vol/select/ ] or [vol/select/ ] to change the security code.
Choose a number between and .
Press and hold [vol/select/ ] or [vol/select/ ] to scroll though the numbers quickly.
As you press [vol/select/ ] or [vol/select/ ], the voice prompt announces current number, and it
appears in the message counter.
When you reach the number you want, press [set] to set the new code.
Note: Don’t forget your security code!
8-2. Dialing in To Your Answering System
Call your telephone number and wait for the answering system to answer.
Note: If you turned on the Toll Saver feature, the answering system will answer after 2 rings if you have new
messages and after 4 rings if you don’t. If you call in to check for new messages, you can just hang up
after the third ring.
While the greeting is playing, press [0] and immediately enter your security code.
The voice prompt announces the current time and the number of messages stored in memory, followed by
short help prompts. After the voice prompts, the answering system sounds intermittent beeps to remind
you that it is waiting for a command.
Note: If you don’t enter a command within fteen seconds, the answering system automatically hangs up and
returns to standby.
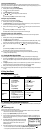
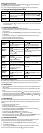
Enter a remote command from the following chart (you can enter during the voice prompts):
To Press To Press
Play Incoming messages [0] then [2] Turn the answering system on [0] then [6]
Stop Operation [0] then [5] Turn the answering system o [0] then [9]
Repeat a message [0] then [1] Hear the voice prompts again [1] then [0]
Skip a message [0] then [3] Start/stop recording a voice memo* [0] then [7]
Delete a message [0] then [4] Start/stop recording a personal greeting* [0] then [8]
* Enter the command again to stop the recording.
When you are nished, just hang up. The answering system automatically returns to standby.
Note: For your convenience, a removable remote operation card is printed at the back of this manual.
8-3. Turn on the Answering System Remotely
If you forgot to turn on your answering system, you can turn it on remotely from any touch-tone telephone.
Call your telephone number, and let it ring ten times.
After ten rings, the answering system answers the phone, but it only sounds the “waiting for command”
beeps.
Press [0] and then enter your security code. You can now use the remote commands to control your
answering system.
To have the answering system remain on after you hang up, press [0] then [6]. The answering system plays
the greeting and sounds a conrmation tone.
Hang up the phone. The answering system will stay on and answer any subsequent calls.
1)
2)
3)
•
•
•
4)
1)
2)
3)
4)
5)
1)
2)
3)
4)
5)
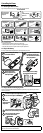
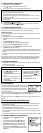
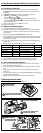
9) Mounting the Base on a Wall
You can mount the phone on any standard telephone jack wall plate.
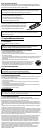
1
Turn the base upside down
to reach the desk stand.
2
On the stand, press in on the two latches near
the bottom of the base, and remove the stand.
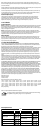
3
Rotate the stand 180 degrees, and insert the
two tabs into the notches marked WALL.
4
Press the latches in and slip them into the
notches near the top of the base.
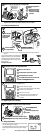
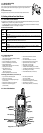
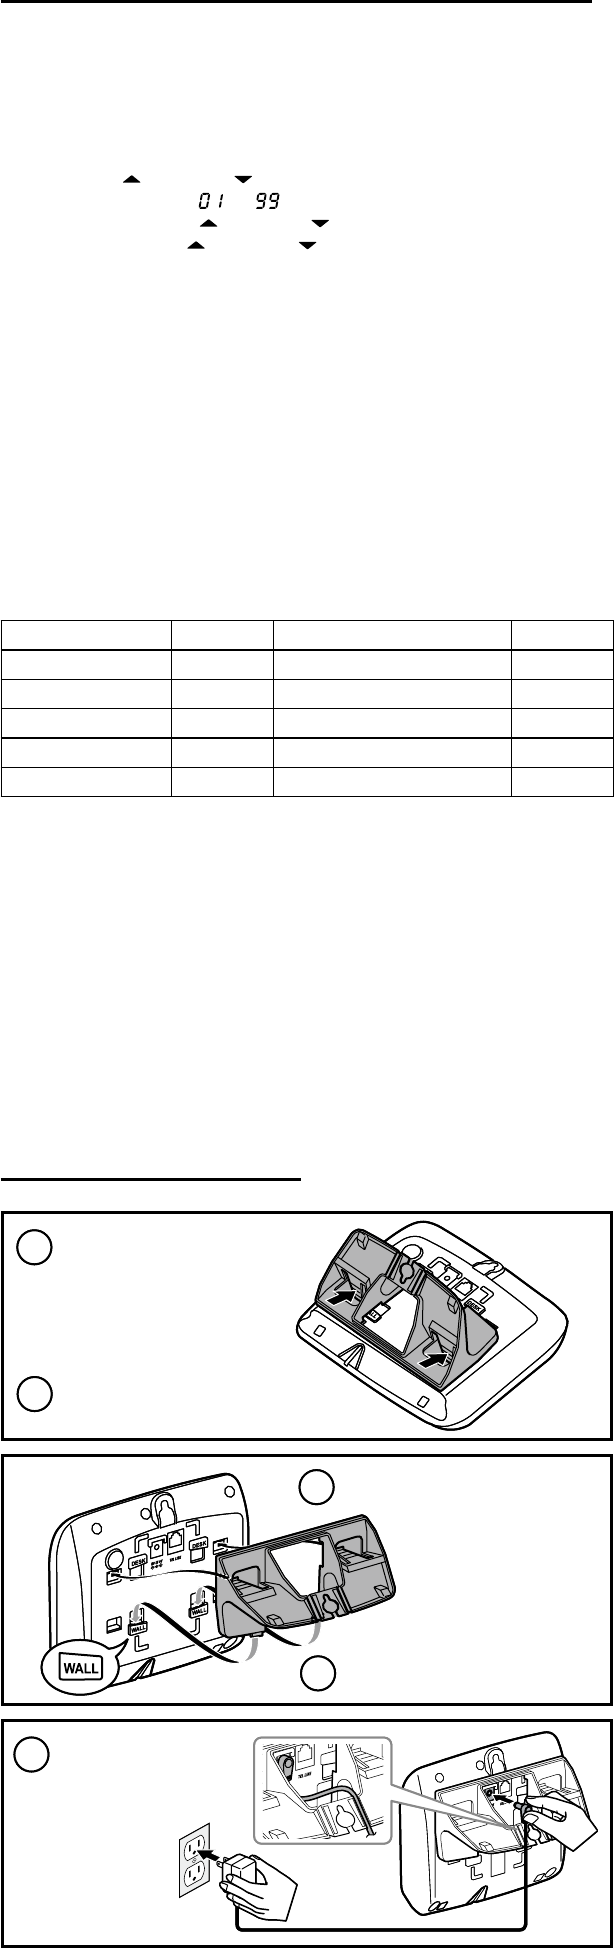
5
Connect the AC adapter to the
DC IN 9V jack, and route the
cord through the molded wiring
channel on right side as shown.
To AC outlet
AC adapter
(supplied)
To DC IN 9V
1
Turn the base upside down
to reach the desk stand.
2
On the stand, press in on the two latches near
the bottom of the base, and remove the stand.
3
Rotate the stand 180 degrees, and insert the
two tabs into the notches marked WALL.
4
Press the latches in and slip them into the
notches near the top of the base.
5
Connect the AC adapter to the
DC IN 9V jack, and route the
cord through the molded wiring
channel on right side as shown.
To AC outlet
AC adapter
(supplied)
To DC IN 9V