


2. Plug the master TR-24’s external power supply into an AC
outlet if desired. If external power is not desired then run off
internal battery.
3. Place the TR-24’s in a location where it will have the best
visibility to the other TR-24s.
4. Plug a headset into the master TR-24 beltpack.
5. Power-up the master TR-24 beltpack in master wireless
mode. The master wireless mode is entered by holding the
<1> button down as the unit boots. Once a beltpack was
booted in a mode (wireless, wired, master wireless), the
beltpack will always boot in that mode until the user sets a
different boot mode.
• The power light should immediately light solid.
• After 20 seconds a beltpack voice prompt will announce
“master wireless” in the headphone.
• Audio channel one’s light will activate indicating
communication has started.
6. Plug headsets into TR-24 beltpacks.
7. When the master TR-24 has finished booting, power-up the
TR-24 beltpacks in wireless mode. The wireless mode is
entered by holding the <TALK> button down as the unit
boots. Once a beltpack was booted in a mode (wireless,
wired, master wireless), the beltpack will always boot in that
mode until the user sets a different boot mode.
• The power light should immediately light solid.
• After 20 seconds a beltpack voice prompt will announce
“wireless” in the headphone.
• Audio channel one’s light will activate indicating
communication has started.
System Operation
By following the previous setup instruction, the system should
now be up and running. Please read the following information for
optimization / best performance of that system.
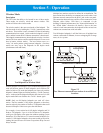
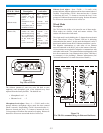
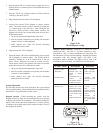
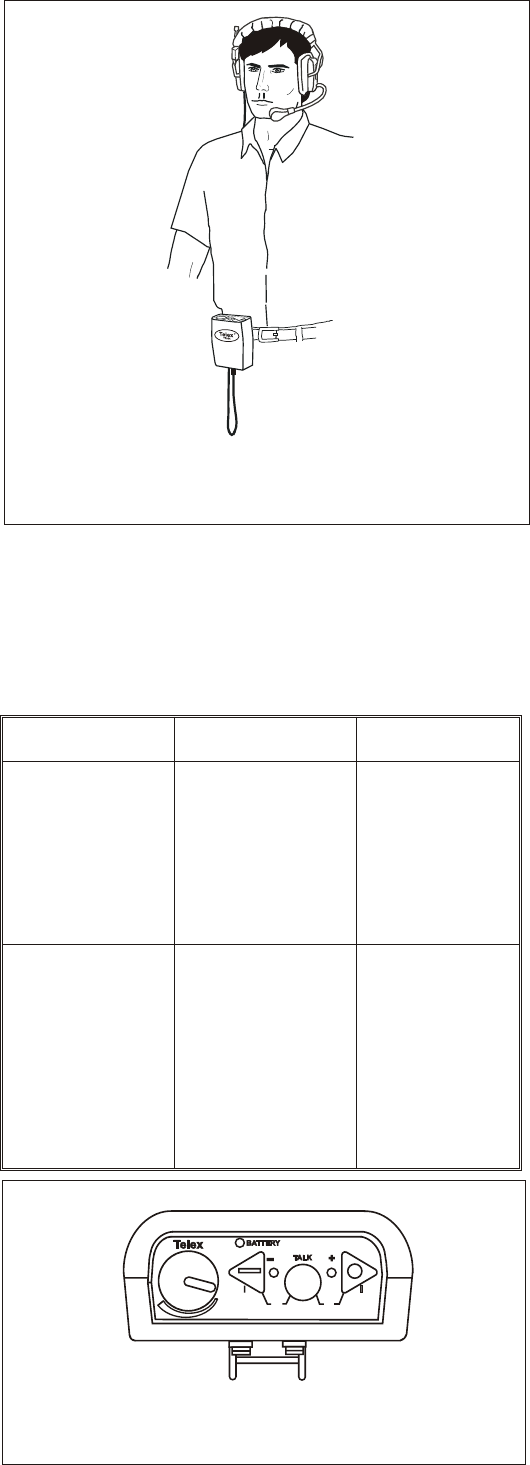
Beltpack position - When operating the system, wear the
beltpack on the hip. Place it in a position that allows for greatest
visibility to the master TR-24 antennas. The internal antennas for
the TR-24 are on the sides of the beltpack case. For best visibility
of antennas, do not place other objects within 6 inches (15cm) of
the beltpack on the belt.
Figure 5-10
TR-24 Beltpack on Hip
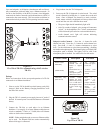
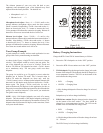
Beltpack Audio Channels -Press the <1> button for audio
channel one only. Press the <2> for audio channel two only.
Press both <1> and <2> buttons simultaneous to select both. Use
the talk button to select between enabling / disabling the headset
microphone path. The channel light(s) will blink if the
microphone path is disabled. The light(s) will be solid if the
microphone path is enabled. See table below for talk modes:
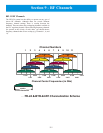
Figure 5-11
Top View of TR-24
R
<TALK> Mode Description Activation
Push-to-Latch/
Momentary
(default mode)
Microphone is
enabled until the
button is tapped
again.
If held down for 1/2
second the
microphone path is
disabled on release.
Tap <TALK>
button. Tap again
to turn off.
<TALK> held
down for over 1/2
second.
Momentary Only
(Push-to-TX)
<TALK> button
enables the audio
path for only as long
as it is held down.
The beltpack will be
in this mode until
reset to
push-to-latch mode.
Press <1> +
<TALK> + <2>
until voice
prompt indicates
momentary mode
(about 3
seconds). Do
again to go back
to push-to-latch
mode.
OFF
MIC
S.T.
A J
D
1
2
A J
D
5-6