Preparation
10
Helpline Tel. No.: U.K. 08700 100 076 R.O.I. 01289 8333
L The unit will not work during a power
failure. We therefore recommend you also
connect a standard telephone to the same
telephone line using a T-adaptor. Your
Panasonic sales shop can offer you more
information about connection possibilities.
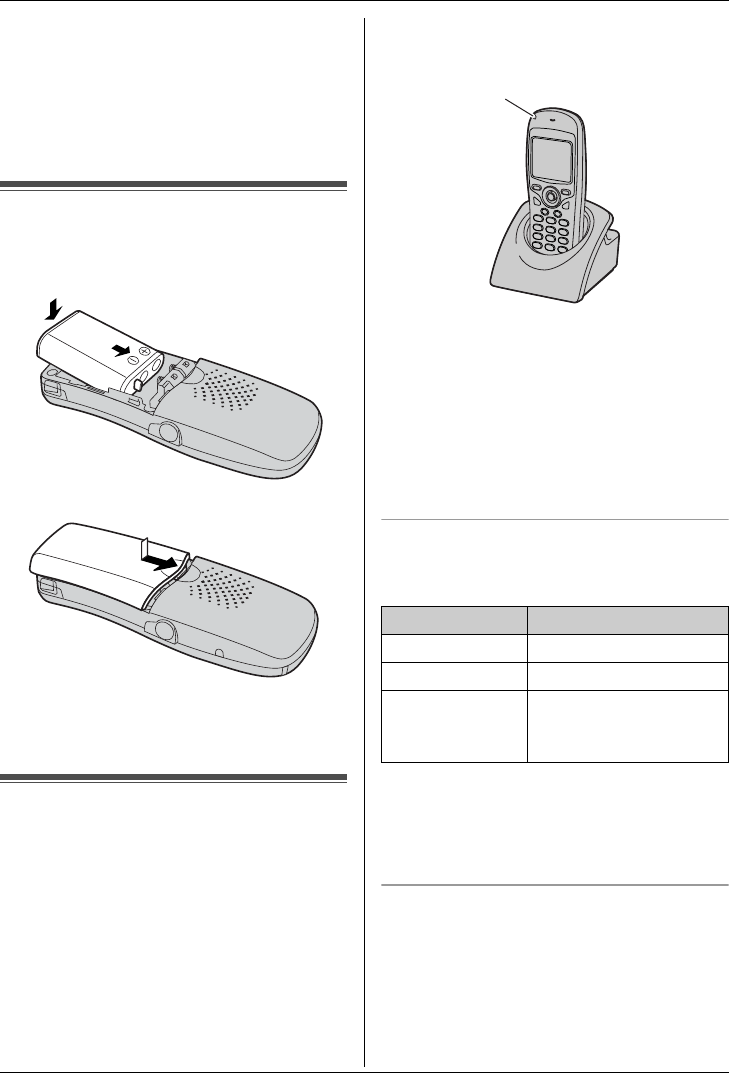
Battery installation
1 Insert the battery as shown. Insert the S
and T end of the battery first.
2 Close the battery cover.
Note:
L Use only a rechargeable battery (page 3).
Battery charge
Place the handset on the charger for
about 5.5 hours before initial use.
The charge indicator turns red while the
battery is charging, and turns green when
the battery is fully charged.
A Charge indicator
Note:
L Clean the charge contacts (page 6) of the
handset and charger with a soft, dry cloth
once a month, otherwise the battery may
not charge properly. Clean more often if
the unit is exposed to grease, dust or high
humidity.
Battery strength
When charging, the battery icon is shown as
follows.
Note:
L If the handset is turned off, it will be turned
on automatically when it is placed on the
charger.
Battery life
After your Panasonic battery is fully
charged, you can expect the following
performance:
2
1
Battery icons Battery strength
5 High
6 Medium
7 Low
When flashing: Needs
to be charged
A


