


7
Installation (Continued)
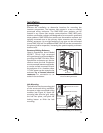
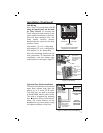
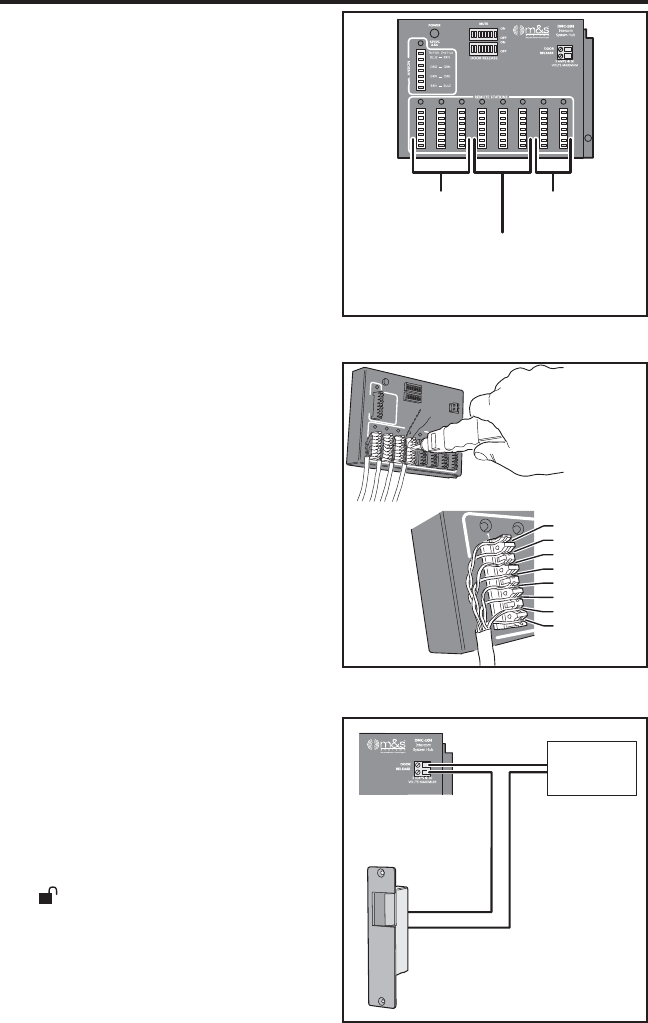
Hub Wiring
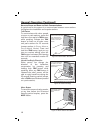
Use a Type 110 punch-down tool (if
using an impact tool, set the tool
to “low” force!) to connect the
Cat-5 cable from each station to the
color coded connectors on the hub.
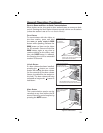
Wire the door station(s) fi rst. The
hub’s station location number
determines the sound of the door
station’s chime.
Hub station 1, 2, or 3 = ding-dong
Hub station 4, 5, or 6 = dong-dong
Hub station 7 or 8 = dong-ding
Wire the remaining stations to the
hub connectors. To document the
installation, note the station type
and locations in the log on Page 17.
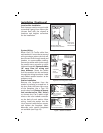
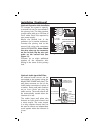
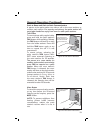
Optional Door Strike Installation
The intercom hub features a normally
open door release relay that can
switch up to 3 amps @ 30 volts.
The relay can be used to activate
a Model DRW electric door strike.
The relay is triggered by pressing
the
button on any room station.
Note: The unlock feature can be
disabled on any room station using
the option switches on the hub.
CHIME 1
"DING-DONG"
CHIME 2
"DONG-DONG"
CHIME 3
"DONG-DING"
DOOR STATION LOCATION NUMBER
DETERMINES THE CHIME SOUND
Figure 8. Door Station Chime Selection
Figure 9. Hub Wiring
BLUE STRIPE
BLUE
ORANGE STRIPE
ORANGE
GREEN STRIPE
GREEN
BROWN STRIPE
BROWN
USE A TYPE 110
PUNCH-DOWN TOOL
TO TERMINATE CAT-5
CABLES FROM
STATIONS
CONNECT
CAT-5 CABLE
WIRES IN
THIS ORDER
Figure 10. Electric Door Strike Wiring
24 VAC
DOOR STRIKE
POWER SUPPLY
DMC-10H DOOR
RELEASE RELAY
3 AMP LOAD MAXIMUM !
M&S SYSTEMS
MODEL DRW
24 VAC ELECTRIC
DOOR STRIKE
DO NOT POWER
DOOR STRIKE FROM
INTERCOM POWER
SUPPLY !
CAUTION !
USE ONLY ONE
DOOR STRIKE
PER SYSTEM