


40
41
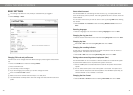
BASIC SETTINGS
The settings only affect the user prole you selected when you logged in.
Select Settings > Basic.
Select Settings > Basic.
Changing PIN code and prole name
The PIN code can be changed from the default setting to protect against unauthorised
use.
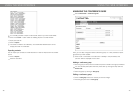
Click on the Edit button under the heading Proles.
Enter a new PIN code.
The code may consist of 8 digits.
If you are changing a user prole, you can also change the name.
Click on the Set and Save buttons.
Make a note of the new PIN code and keep it in a safe place.
The administrator is always able to view and change the name and PIN code of the
prole.
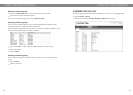
USING THE WEB INTERFACE
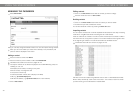
Select default account
The Konftel 300IP can save settings for two accounts, e.g. a company PBX and a
public IP telephony service provider. This setting determines which account should be
used as default.
You can select the account you want to use for a call by pressing LINE before dialling
the number.
Select Account 1 or Account 2 under the heading Default account and click on
Save.
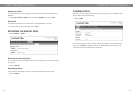
Selecting languages
Select a language in the list under the heading Language and click on Save.
Changing the ring tone level
Select the tone level from the list under the heading Ring level and click on Save.
Changing key tone
Select On or Off under the heading Key tone and click on Save.
Changing the recording indicator
A short beep is heard every 20 seconds so that all the parties in the call know it is
being recorded. This feature can be turned off.
Select On or Off under the heading Recording tone and click on Save.
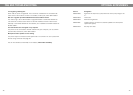
Settings when connecting external equipment (Aux)
The Konftel 300IP can be connected to a wireless headset or an external PA system.
An optional PA interface box is required for PA system connection.
Select the PA option to activate features for external microphone mixer and PA
system.
Do not select the PA option unless a PA system is connected. This option turns
off the internal microphone and internal speakers. The HEADSET option may be
selected whether or not a headset is connected.
Changing the time format
Select 12 hour or 24 hour under the heading Time format and click on Save.
USING THE WEB INTERFACE