


3
receptacle. Do not cut or remove the grounding prong
from this plug. (Model AA has no electric connection).
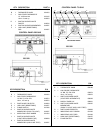
LEVELING
The Keating Gas Fryer will operate at its highest effi-
ciency when properly leveled. Place a level on the fryer
from side to side. For fryer on legs, the bottom foot of
the leg is adjustable. Turn counterclockwise to
decrease height, or clockwise to increase height until
level. For fryers with casters, the casters are adjustable
by loosening the jam nut and turn the caster in or out.
When the desired level is reached, tighten the jam nut.
Adjustments of more than 3/4" are not recommended
on any caster. The same procedure should be followed
to level the fryer from front to back.
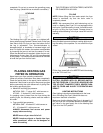
PLACING KEATING GAS
FRYER IN OPERATION
Never leave your fryer operating unattended.
(When all previous instructions have been completed).
Check the serial plate on the panel (inside cabinet) to
determine if the burner is set up for the proper type gas
before connecting the quick-disconnect or piping from
the building gas supply pipe.
a. Maximum incoming gas pressure
NATURAL GAS – 7 inches W.C. with burners on
LP GAS – 11 inches W.C. with burners on
If a popping noise is heard from the fryer during the
cooking cycle, the following checks must be made in
this order:
b. Fryer manifold gas pressure
NATURAL GAS – 4 inches W.C. with burners on
LP – 10 inches W.C. with burners on
ALWAYS disconnect fuel source and power
supply before servicing.
NEVER move a fryer when full of oil.
NEVER introduce objects or liquids into fryer,
while operational, which are not designed or
made for cooking.
THIS FRYER MAY NOT BE ALTERED, MODIFIED
OR CHANGED IN ANY WAY.
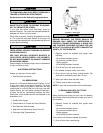
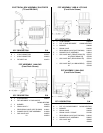
FILLING
NOTE: Before filling the fryer make certain the fryer
vessel is sanitized, dry and the drain valve is
completely closed.
NOTE: We recommend that solid shortening not be
used in a Keating Gas Fryer if it is not equipped with a
melt cycle. If solid shortening is used, it should be melt-
ed prior to filling the fryer vessel. Damage done by
melting solid shortening in the fryer vessel will void the
warranty.
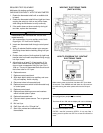
CCAAUUTTIIOONN
Oil expands when heated. The “Fill Level” line has
been provided to ensure optimum cooking while ensur-
ing the safety of the operator. Do not overfill the fryer
vessel.
Fill Level Line
Fill the fryer vessel with oil or MELTED solid shortening
up to the “Fill Level” line.
CCAAUUTTIIOONN
BE SURE THE HEAT TRANSFER TUBES ARE COM-
PLETELY COVERED WITH OIL BEFORE SWITCH-
ING THE FRYER ON. IF OIL LEVEL DROPS BELOW
TOP OF HEAT TRANSFER TUBES, SEVERE DAM-
AGE TO FRYER AND INJURY TO OPERATOR MAY
RESULT.
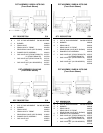
LIGHTING INSTRUCTIONS
(See lighting instructions plate attached to the inner
door of Keating Gas Fryer.) Model AA does not
require an electrical connection.
Make sure that the Keating Gas Fryer is plugged in. If
not your fryer will not operate. Make sure that the main
gas valve on the gas supply line to the Keating Gas
Fryer is in the “ON” position.