


CONNECTING CHAT 150 TO A VIDEO CONFERENCING DEVICE
Perform the following steps to connect your Chat 150 to a video conferencing device:
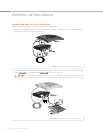
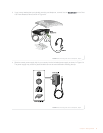
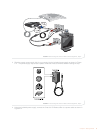
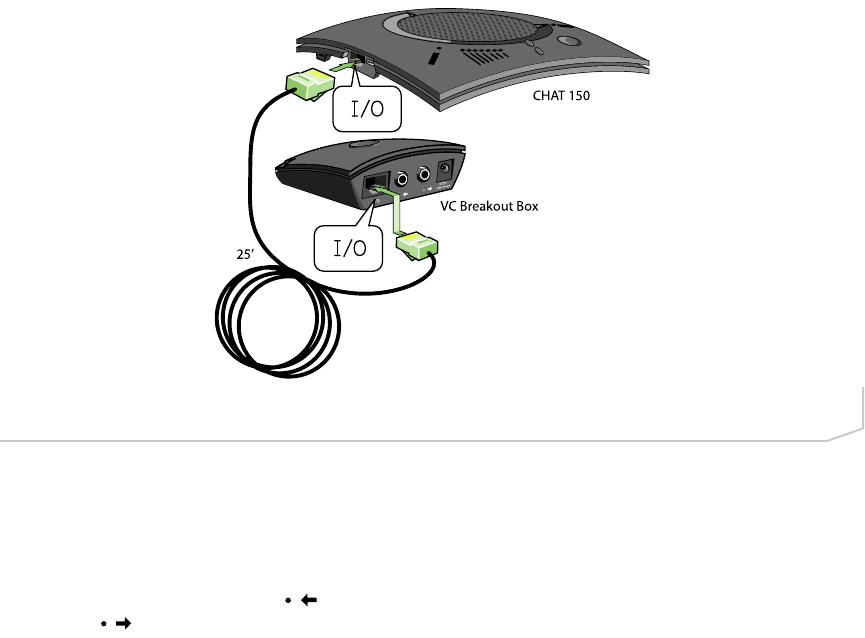
1. Using the included ClearOne RJ-45 Chat 150 connection cable, connect the Chat 150 VC Breakout Box to
your Chat 150 as shown in Figure 2.9.
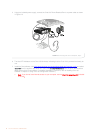
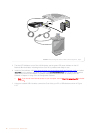
2. Using the included 6’ ClearOne RCA connection cable, connect the Chat 150 VC Breakout Box to both
your video conferencing device and/or TV/monitor, as shown in Figure 2.10. The cable has two RCA con-
nectors on one end, and five on the other end, split into two groups with two and three connectors.
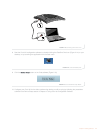
The end with two connectors goes to the Chat 150 VC Breakout Box; the blue connector connects to the
audio in port (identified by the icon), and the black connector goes to the audio out port (identified
by the icon).
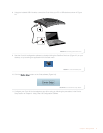
On the other end of the cable, the group with the red and white connector plugs into the left and right
audio ports on your TV. This connection allows you to either use the speaker on your Chat 150 for audio
from the far end, or alternatively you can use the speakers on the TV. See Advanced Settings: Audio
Settings in Chapter 3 Using Chat 150 Configuration Software for details on using this option.
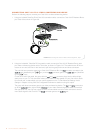
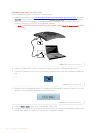
The group with three connectors goes to your video conferencing device. The red and white connectors
go to the audio out ports (right and left). However, if your video conferencing device does not have left
and right audio out, but only has a single channel, connect either the red or white connector to send a
mono audio signal to the Chat 150. The black connector goes to the audio in port.
8 Technical Services: 800.283.5936
(
(
)
)
(
(
)
)
(
(
)
)
(
(
)
)
FIGURE 2.9 Connecting Chat 150 to a Video Conferencing Device, Step 1