Installing Your Phone
Installing Your Cisco SPA 303 IP Phone
Cisco Small Business IP Phone SPA 30X User Guide (SIP) 22
2
Connecting the Power
Insert one end of the power cord into an outlet and insert the other end of the
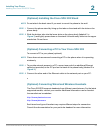
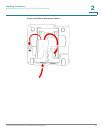
power cord into the power port on the phone body (labeled 6 in Figure 3).
NOTE To power the phone through the Ethernet connection, use the optional Cisco
POES5 5-Volt Power Over Ethernet Splitter accessory. See the Cisco POES5
documentation on Cisco.com for more information.
Connecting Your Cisco SPA 303 to the Network
STEP 1 Insert one end of the Ethernet cable into the network port on the phone body
marked “SW” (labeled 3 in Figure 3).
STEP 2 Insert the other end of the Ethernet cable into the appropriate device, such as a
network switch, on your network.
(Optional) Connecting Your Cisco SPA 303 to the Wireless Network
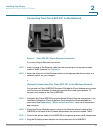
You can use the Cisco WBP54G Wireless-G Bridge for Phone Adapters to connect
the IP phone to a Wireless-G network instead of the wired local network.
NOTE Cisco does not recommend connecting a PC to the phone when it is operating
wirelessly.
To connect your phone to the Cisco WBP54G:
STEP 1 Configure the Cisco WBP54G using the Setup Wizard. See the instructions in the
Wireless-G Bridge for Phone Adapters Quick Installation Guide
, available on
cisco.com. See Appendix A, “Where to Go From Here,” for a list of documents
and locations.
STEP 2 During the Setup Wizard process, connect the Ethernet network cable of the
WBP54G to the back of the IP phone base station into the slot marked “SW.”
STEP 3 Connect the power cable of the WBP54G to the power port on the IP phone base.
STEP 4 Plug the IP phone power adapter into the power port of the WBP54G.
STEP 5 Plug the other end of the IP phone power adapter into an electrical outlet.


