


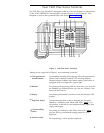

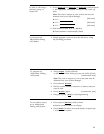

7) Hold button
8) Dial pad
9) Feature buttons
10) Speakerphone/
headset adapter jack
(on back of telephone)
11) Line jack (on back
of telephone)
12 Handset jack (on
back of telephone)
13) Microphone
For putting a call on hold.
The standard 12-button pad for dialing phone numbers and
accessing features. The letters, "Q" and "Z" have been added
to the appropriate dial pad keys for directory access, and the
"5" button on your dial pad has raised bars for visually-
impaired users.
For accessing features, labeled with feature names (22
buttons).
For connecting an external speakerphone or a headset
adapter to your telephone. Located on the back of your
telephone, labeled
For connecting a line cord to your telephone. Located on the
back of your telephone, labeled "LINE."
For connecting the handset cord to the telephone. Located on
the back of your telephone, labeled
For speakerphone operation. Used when the speakerphone
options is set and speaker button is depressed.
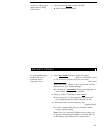
14) Select button
Can be used in 3 different ways:
1)
2)
3)
Used with [
Drop Test
] to initiate a self-test of your
telephone
Used with [
Conference Ring
] select your own personalized ring
from among 8 available patterns
Used with [
Speaker Reset Spkr
] to perform an acoustic test of
the environment and adjust the speakerphone to the
surrounding acoustic environment for optimal
performance.
15) Mute button
16) Message light
For turning off the microphone of the built-in speakerphone
or the handset so the other person cannot hear you.
Note: If your telephone is set for the Speaker (listen-only)
feature, pressing the Mute button will affect only the handset.
When the Speaker feature is in use, the red Mute light will
always be on.
For indicating when a message has been left for you (steady
red light).
2