


Configuring Intercoms
34
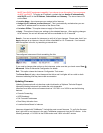
• Door / Relay Output - on IP Intercom models that include a relay (dry contact), the
Door/Gate button will become visible in the Intercom View / Custom View. This option is
used in conjunction with Door Relay Activate (see below) which sets the amount of time the
relay will stay active
• Logic Input - used with custom developed applications to monitor other equipment.
• Activate On MIC / Speaker - Selecting this option turns on GPIO 4 when ever the
Intercom’s Microphone and/or Speaker are activated. When both Mic and Speaker are
checked, the Intercom will wait for 1 second of inactivity before turning off GPIO 4. Use of
the Mic option requires the Intercom’s OS Version to be 1.9.5.74Y or higher.
Remote Listen Disable - disables the ability to remotely turn on the Intercoms Microphone.
With this option set, the Intercom Operator must press the PTT button on the Intercom in order
for the other end to listen to the Intercom.
Default to Listen (Direct Mode) - is only available if option Set as Server-Peer is enabled.
Enables the Server-Peer intercom in Direct Mode to automatically turn on the remote
Intercom’s Microphone when the Intercoms connect.
No Beep Tone After PTT Released - turns off the soft beep that is played on the intercom
after the PTT button is released
Display in Custom View Tab - will force the Intercom to appear in the Custom View tab, even
if it is included within a Paging Group.
Door Relay Activate - on IP Intercom models that include a relay for opening a door or gate,
this option sets the number of seconds that the intercom’s relay will stay active when the
Door/Gate button is pressed in the Intercom View / Custom View. This is used in conjunction
with GPIO 4 - Door / Relay Output
Intercom Configuration - TalkMaster Clients
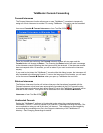
Configuring intercoms for use with TalkMaster (Point to Multi-Point)
This procedure configures Intercoms to connect to the IP address of the PC running
TalkMaster™. This connection can be on a LAN, WAN or across the Internet.
To configure two intercoms to connect to each other, please see Intercom Configuration -
Direct Mode.
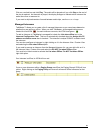
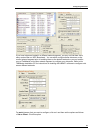
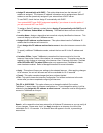
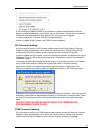
From the main TalkMaster™ screen, select the menu Admin
Configure Intercoms. The
system will scan the local network segment using a UDP Broadcast to find all IP Intercoms.
New Intercoms will show up with IP addresses of zero.
The Icom ID displayed on the
screen will match the ID# printed on the back of the Intercom.