Getting Started
19
US
Getting Started
continued
wdwf wgwhwjwswa
12 3 4
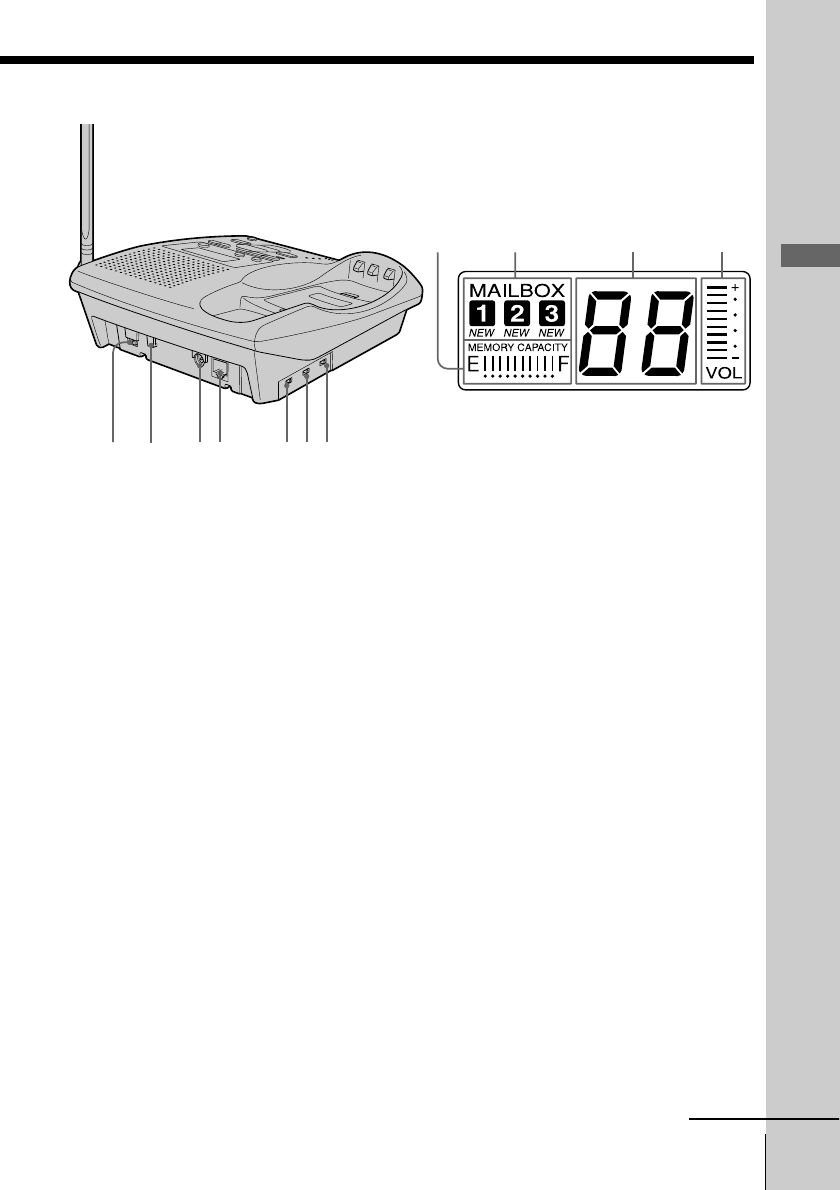
Display
The display on the base unit shows the
answering machine operation.
1 Memory capacity indicator
(p. 40)
Indicates the available memory
capacity, fromE (Empty) to F (Full),
for recording. The bars increase as
the available memory capacity
decreases.
2 MAILBOX indicator (p. 43)
Displayed when there are messages
recorded and when the messages
are being played back.
“NEW” flashes when there are new
messages recorded.
3 Message counter (p. 43)
Indicates the number of new
messages recorded. “A” appears in
the announcement only mode. “F”
appears when there is no space to
record messages. “P” appears when
the power is turned on.
4 VOL (volume) indicator
Indicates the speaker volume. The
bars increase as the volume is
turned up.
ql HANDSET LOCATOR button
(p. 32)
Allows you to page the handset.
w; PLAY/STOP (MAILBOX 1, 2, 3)
buttons (p. 43)
Plays back the messages in each
mail box.
wa DIAL MODE switch (p. 10)
Selects pulse or tone dialing.
ws Hook for AC power adaptor
cord (p. 9)
wd DC IN 9V jack (p. 9)
wf LINE (telephone line) jack
(p. 9)
wg AUDIBLE INDICATOR switch
(p. 40)
Selects the answering mode.
wh REC. QUALITY switch (p. 39)
Selects the recording quality.
wj RINGER SELECT switch (p. 38)
Selects the ring time.


